
 Save
Save
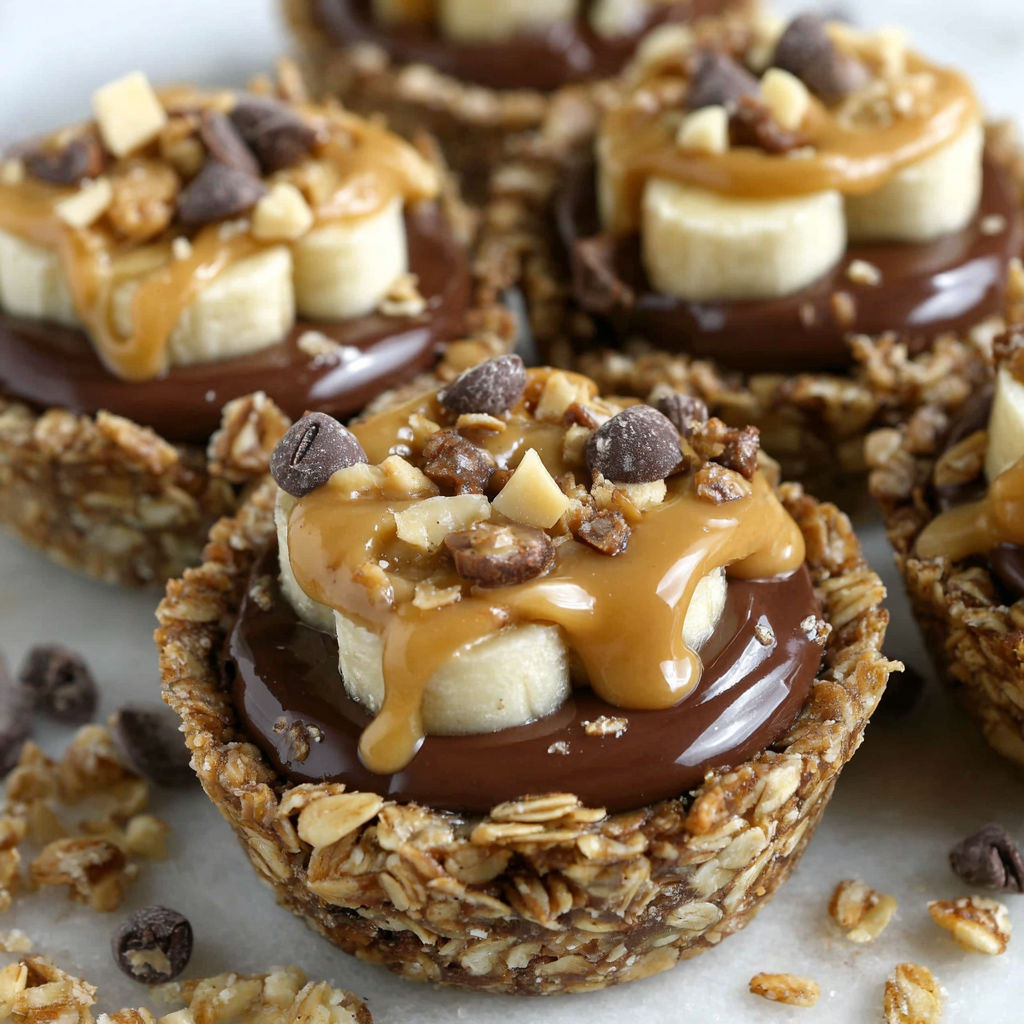
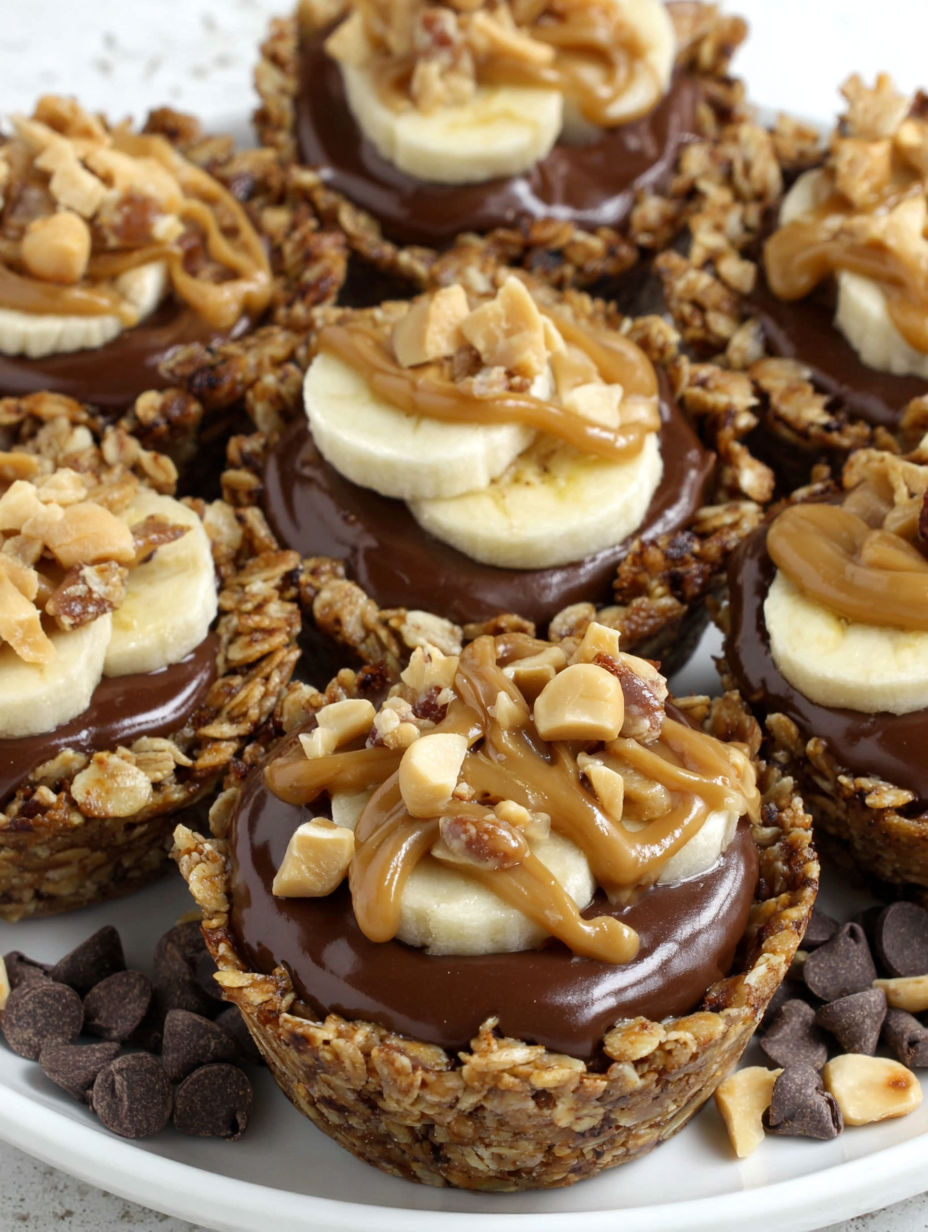
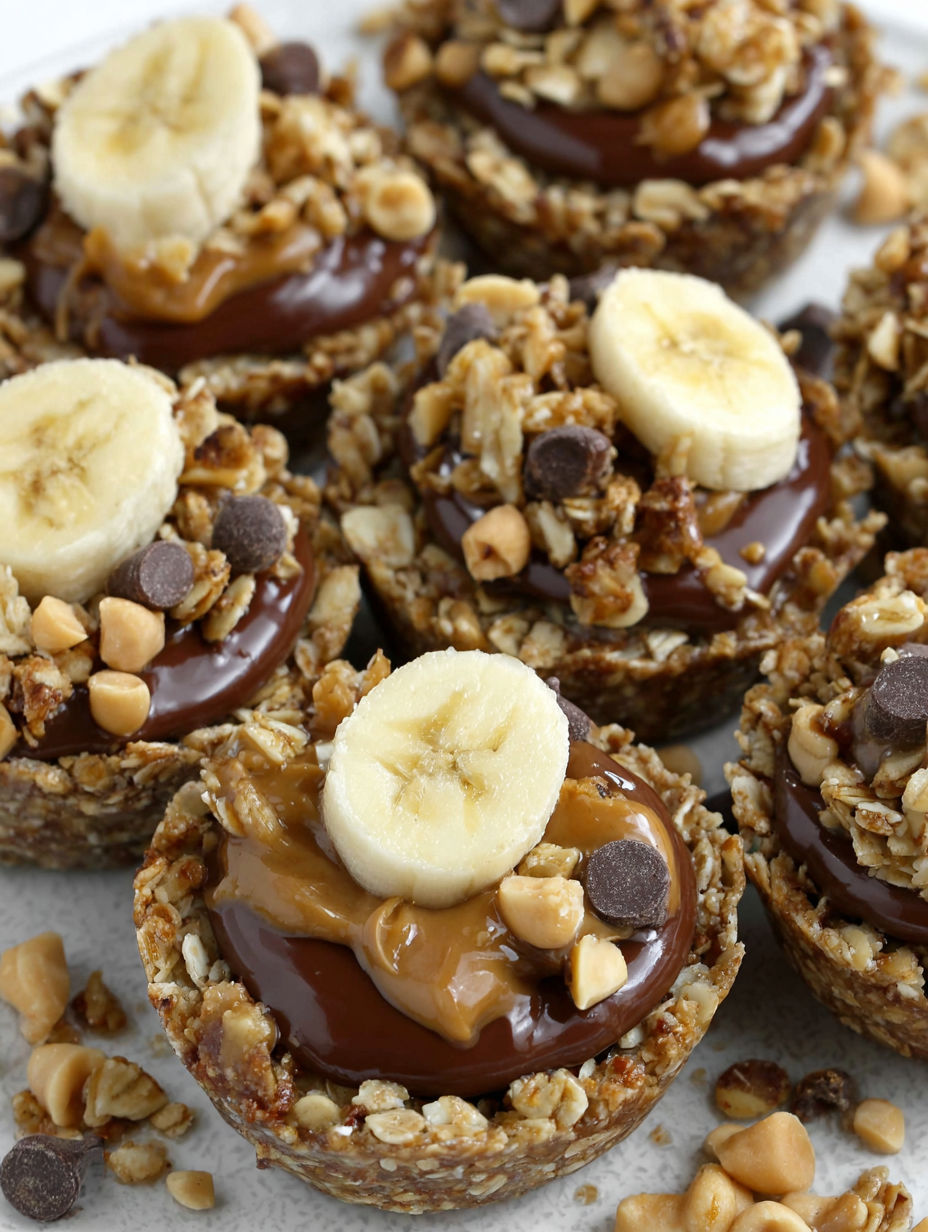
Chocolate Granola Cups with Peanut Butter Filling are my go—to treat when I want something easy, sweet, and satisfying without turning on the oven. These little cups blend crunchy granola with creamy peanut butter and rich chocolate, making them the ultimate snack for breakfast or anytime you need a pick—me—up. Plus, they come together fast with just a handful of ingredients you might already have on hand.
These granola cups were born out of a long afternoon when my kids kept asking for something fun and chocolatey but the oven was off—limits. Now they ask for them every week and love helping press the mixture into the tins.
Ingredients
- Honey granola: for a naturally sweet and crunchy base choose a brand with big clusters for best texture
- Chopped peanuts: add protein and salty crunch unsalted roasted peanuts work well here
- Coconut oil: helps the chocolate mixture set and gives a subtle tropical flavor go for virgin coconut oil if possible
- Dark chocolate: finely chopped for smooth melting use at least 70 percent cocoa for depth
- Peanut butter: both for the granola base and creamy filling natural peanut butter gives the best flavor and texture
- Honey: binds the cups and brings a touch of floral sweetness raw honey adds extra flavor
- Fresh banana slices (optional): for topping add natural sweetness and a bit of freshness
Instructions
- Crush Granola and Prep:
- If your granola has big clusters place it in a zip top bag and lightly crush with a rolling pin until pieces are bite—sized. Combine the granola and chopped peanuts in a large mixing bowl. Toss together well to distribute the peanuts throughout the granola.
- Melt Chocolate Mixture:
- Add chopped dark chocolate and coconut oil to a heatproof bowl and melt gently using a microwave in 30 second bursts or over a saucepan of simmering water. Stir after each heating until completely smooth. Blend in the peanut butter and honey until everything is fully combined and glossy.
- Mix and Bind:
- Pour the chocolate mixture over your granola and peanuts. Stir thoroughly with a sturdy spatula making sure every piece is coated in chocolate. If the mixture seems too wet let it cool for a minute so the chocolate begins to set. If it remains runny mix in a handful more granola. If too dry drizzle in extra honey until the mixture holds together when pressed.
- Form the Cups:
- Generously grease a 12 count standard muffin pan with nonstick spray or coconut oil. Divide the granola mixture evenly among the cups. Use the back of a spoon or your fingers to press the mixture firmly into the bottom and up the sides creating a deep dent in the center for filling. Freeze the tin for about five to ten minutes until the cups are firm to the touch.
- Release and Fill:
- Carefully lift each cup from the pan using a thin knife to loosen if needed. If stuck let the pan sit at room temperature for three to five minutes so the cups release cleanly. Spoon about one tablespoon of peanut butter into the dent of each cup. If your peanut butter is very thick warm it gently so it spreads easily.
- Top and Store:
- Place a slice of fresh banana on top of each cup if you like. Transfer the finished cups to an airtight container. Store in the refrigerator for up to a week or freeze for up to three months for longer keeping.
I have tried a dozen versions of these cups but nothing beats the magic of real dark chocolate melting into honeyed granola. These were the treat my niece insisted on for her first sleepover and she now calls them my chocolate wonders.
Storage Tips
These granola cups keep best refrigerated since the chocolate and peanut butter stay firm and hold their shape. For longer storage freeze the cups in a single layer then transfer to a bag or container. Thaw five minutes before enjoying for the best texture.
Ingredient Substitutions
Swap honey granola for nut—free or gluten—free granola to suit allergies. Almond butter works beautifully if you want extra nuttiness or if you are out of peanut butter. For a sweeter touch try milk chocolate though I find dark chocolate balances the sweetness perfectly.
Serving Suggestions
Serve these cups cold straight from the fridge for a super refreshing treat. If you love a little crunch sprinkle extra chopped peanuts or even cacao nibs over the peanut butter before topping with banana. I sometimes drape a few raspberries on top for a tart contrast.
Cultural and Historical Notes
Granola cups have become popular as no bake snacks over the last decade inspired by breakfast bars and energy balls. This chocolate peanut butter version nods to classic American flavors and is my answer to those nostalgic chocolate peanut butter cups with a wholesome homemade twist.
Seasonal Adaptations
Swap banana slices with fresh berries when in season. Use pumpkin seeds in autumn for a nutty crunch. Add dried cranberries or cherries for a holiday touch.
Success Stories
My youngest niece made these with sunflower seed butter for her nut free school snack and came home asking for more. Friends have told me these are the first thing to disappear at brunch parties. I love gifting them for new neighbor welcomes since they are allergy flexible and keep so well.
Freezer Meal Conversion
For a freezer snack lay the finished granola cups on a lined tray and freeze until firm. Store in a zip top bag removing air to avoid freezer burn. They taste wonderful eaten right from frozen on hot days.
You will love these granola cups for both breakfast and snacking. Make a double batch and keep them stashed for easy grab—and—go treats all week long.
Common Recipe Questions
- → How do you ensure granola cups hold their shape?
Press the granola mixture firmly into the cupcake tin and chill until they set. This helps them keep their cup shape.
- → Can I substitute the peanuts or use other nuts?
Absolutely! You can swap peanuts for almonds, cashews, or omit them entirely if you prefer.
- → What type of peanut butter works best?
Creamy peanut butter spreads easily, but you can use chunky for added texture. If it's too thick, warm it slightly before filling.
- → Are banana slices necessary for topping?
Banana slices are optional but add a fresh, sweet contrast to the chocolate and peanut flavors. Use them if desired.
- → How should these cups be stored?
Store in an airtight container in the fridge for up to one week or freeze for longer storage.
- → Can the cups be made ahead of time?
Yes, prepare and chill the cups in advance, then fill with peanut butter and banana right before serving.