
 Save
Save
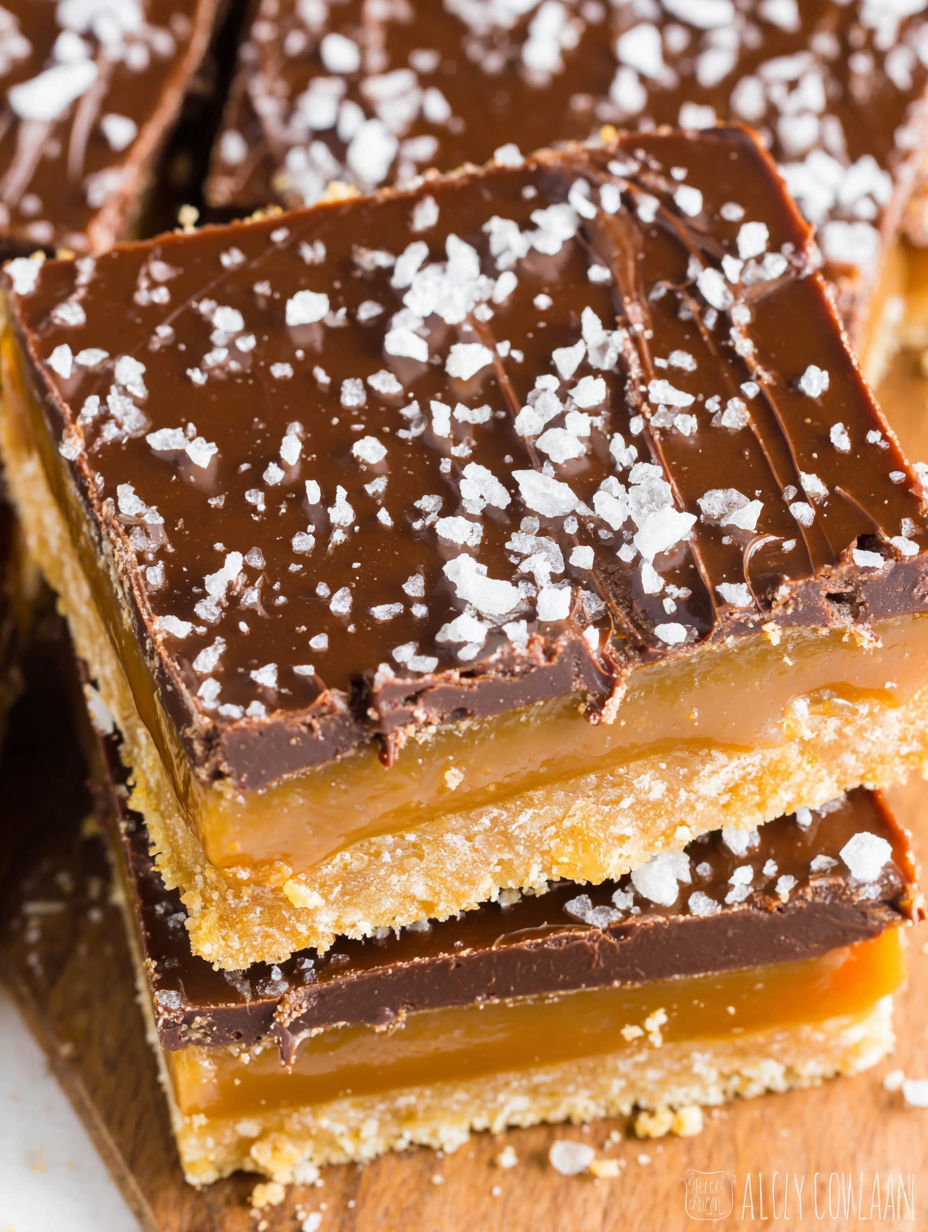
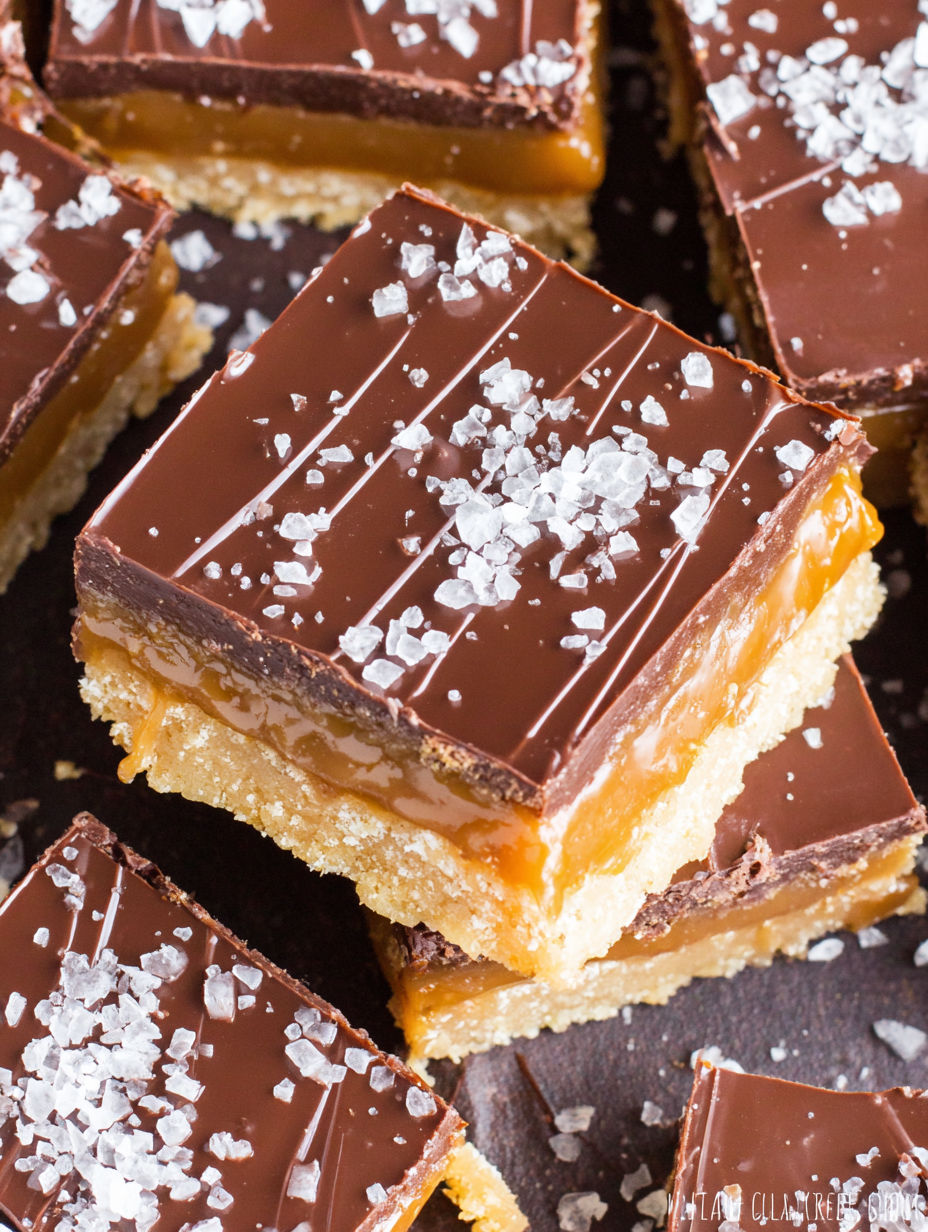
Caramel Millionaire Bars are a fantastic treat whether you're celebrating or just craving something sweet during a lazy afternoon. With three rich layers—a crumbly cookie base, smooth caramel, and a thick layer of chocolate—they're everything you could wish for in a homemade dessert. The best part? You don’t need any fancy candy thermometers or pro skills to nail it.
The first time I made these for my kids' school event, they were gone in just ten minutes and I barely snagged a piece for myself. Since then, it's been my go-to bake whenever family or friends visit. Trust me, you won't regret whipping up a double batch.
Ingredients
- Unbleached all-purpose flour: Helps the cookie base stay put while offering a clean flavor, pick a brand without extras for the best texture
- Salted butter: Adds lots of flavor and makes everything tender, go for high-quality butter to get that richness
- Pure vanilla extract: Enhances flavors in every layer, choose real vanilla for the best scent
- Granulated sugar: Makes the cookie layer lighter, finer grains blend in better
- Brown sugar: Contributes a deep richness to the caramel for that classic toffee vibe, fresh and moist sugar gives smooth caramel
- Sweetened condensed milk: Essential for a thick and easy caramel, opt for full fat for the top results
- Light corn syrup: Keeps the caramel smooth and shiny
- Quality salt: Enhances the flavor in both the base and topping, flaky sea salt or Maldon works great
- Milk chocolate chips: Create the shiny finish—smooth and creamy, so use good-quality chips for the best melt
- Heavy cream: Gives the chocolate a luxurious silky feel
- Finishing salt: Adds those delicious sweet and salty bites on top, sprinkle it lightly
- Optional: If you have unsalted butter, just throw in a pinch of salt for each step
Instructions
- Prepare the Cookie Base:
- Get your oven heating to 350 degrees Fahrenheit. Lightly grease an eight-inch square baking pan and line it with parchment paper, letting it hang over the edges so you can ease out the bars later. Spray the parchment lightly too for easy release. In a stand mixer or using a hand mixer, cream the butter, vanilla, and sugar for at least three minutes until it's really light, pale, and fluffy. Gradually add the flour and mix just until the dough forms, it'll look slightly crumbly. Evenly press the dough into the pan bottom using your palms or a flat spatula, not the sides. Prick the whole cookie base gently with a fork so it bakes evenly without rising or bubbling.
- Bake and Cool:
- Pop it in the oven and let it bake for about twenty-five minutes until the edges just begin to turn golden. You want the cookie to set without browning for a soft bite. Once it's done, use the parchment paper to lift the cookie layer onto a wire rack. Cool it completely while you prep the caramel. This cooling time is crucial for the caramel to sit well on top.
- Cook the Caramel:
- In a medium saucepan, combine all caramel ingredients except for the vanilla. Keep it over medium heat, gently whisking continuously as it warms and blends. Once it starts to simmer, turn the heat down low and keep whisking. Watch for it to thicken and darken into a rich caramel gold, which should take about twenty minutes. If you've got a thermometer, aim for a reading of 220 to 225 degrees for the perfect consistency; however, you’ll notice it thickening as you whisk. Immediately take it off the heat and stir in the vanilla.
- Set the Caramel:
- Put the cooled cookie base back in the cleaned baking pan, making sure the parchment paper stays flat against the sides. Quickly pour the hot caramel over the base, letting it spread naturally. Let it cool at room temperature for ten minutes, then place it in the fridge for at least an hour so the caramel can firm up before you add the chocolate.
- Melt the Chocolate:
- Place chocolate chips in a medium microwave-safe bowl. Heat the cream until it’s steaming but not boiling, then pour it directly on top of the chocolate. Cover the bowl with a plate immediately so the chocolate can steam and melt gently. Wait five minutes before whisking everything together until you have a smooth and glossy ganache. Microwave for just ten more seconds if some chunks are left, but don’t overdo it. Once it’s smooth and a little cooled, whisk in the vanilla, then pour it over the chilled caramel layer, spreading it gently with an offset spatula for a beautiful finish.
- Chill and Finish:
- Let the pan sit at room temperature for five to ten minutes before lightly sprinkling some finishing salt—watch it doesn’t dissolve into the chocolate if you do it too early. Let it set for an hour at room temperature, then cover it tightly and refrigerate for at least five hours or overnight for the cleanest slice and best layered texture.
- Slice and Serve:
- Use the parchment edges to lift the bars out of the pan and carefully peel the paper off the sides. Cut with a sharp long knife, cleaning the blade between slices for bakery-style cuts. Keep the bars in an airtight container in a cool place or in the fridge to keep them fresh and firm.
Sweetened condensed milk is my secret for that rich caramel layer. I once tried substitutes, but nothing gives that creamy fudge-like quality like the real deal. Now my kids love helping with the chocolate topping just for the chance to lick the bowl.
Storage Ideas
For the best slices and texture, always chill the bars. They can be stored in a sealed container in the fridge for about a week. If you want them to last longer, freeze the cut bars on a baking sheet first, then bag them. They taste great straight from the freezer or after a quick thaw. Try to keep them away from strong fridge smells like onions or garlic because the caramel can absorb those flavors.
Ingredient Alternatives
If you're looking for a gluten-free option, a high-quality all-purpose gluten-free flour blend works nicely. Brands like Bob’s Red Mill or Cup4Cup are great choices. You can swap milk chocolate chips for dark ones if you're after a richer taste, or use a mix if you enjoy both. Maple syrup or golden syrup can replace corn syrup in the caramel—just stick to the same amount for the right texture.
Serving Ideas
I like cutting these bars into small squares for a sweet table at family gatherings. They pair wonderfully with coffee or tea after a meal for a sweet treat. Arrange them on a platter with fresh fruit or lightly salted nuts for a beautiful contrast.
Cultural Roots and Seasonal Ideas
These Millionaire Bars or millionaire shortbread come from Scotland, dating back to the 19th century. They became popular because they're easy to transport and stay fresh. In the winter, try adding a dash of cinnamon to the chocolate or caramel. During the summer, serve them chilled for a refreshing dessert.
Seasonal Twists
Add fleur de sel as a finishing touch for the holidays. Mix in some orange zest into the caramel for winter flavors. Top with a handful of toasted chopped pecans or almonds for added crunch.
Success Stories
These bars have been a hit at bake sales, office parties, and even wedding dessert tables. Friends who claim they're too sweet always end up coming back for more. One holiday, I made a double batch and not a single crumb remained.
Freezer Meal Tips
Slice the cooled bars and freeze them in a single layer before stacking them in a freezer-safe bag. When you want a treat, just take one out and let it sit for ten minutes. They’re amazing, even frozen.

Caramel Millionaire Bars are totally worth the effort. Make a batch and enjoy watching them vanish at any event.
Common Recipe Questions
- → What makes the layers of these bars distinct?
The rich caramel, silky chocolate, and buttery shortbread create three unique layers, each offering its own texture and flavor.
- → Can I use unsalted butter instead of salted?
Sure, just sprinkle a bit of extra salt in the layers that call for salted butter to keep the taste balanced.
- → How do I keep the chocolate layer smooth?
Make sure to let the hot cream fully melt the chocolate chips before you stir; whisk gently for a nice, glossy finish.
- → Why chill the bars overnight?
Chilling helps all the layers to set completely, which makes it easier to slice and brings out the flavors in every bar.
- → What’s the best way to slice them cleanly?
Use a sharp knife and clean it between cuts to keep the edges neat and avoid sticking.