
 Save
Save
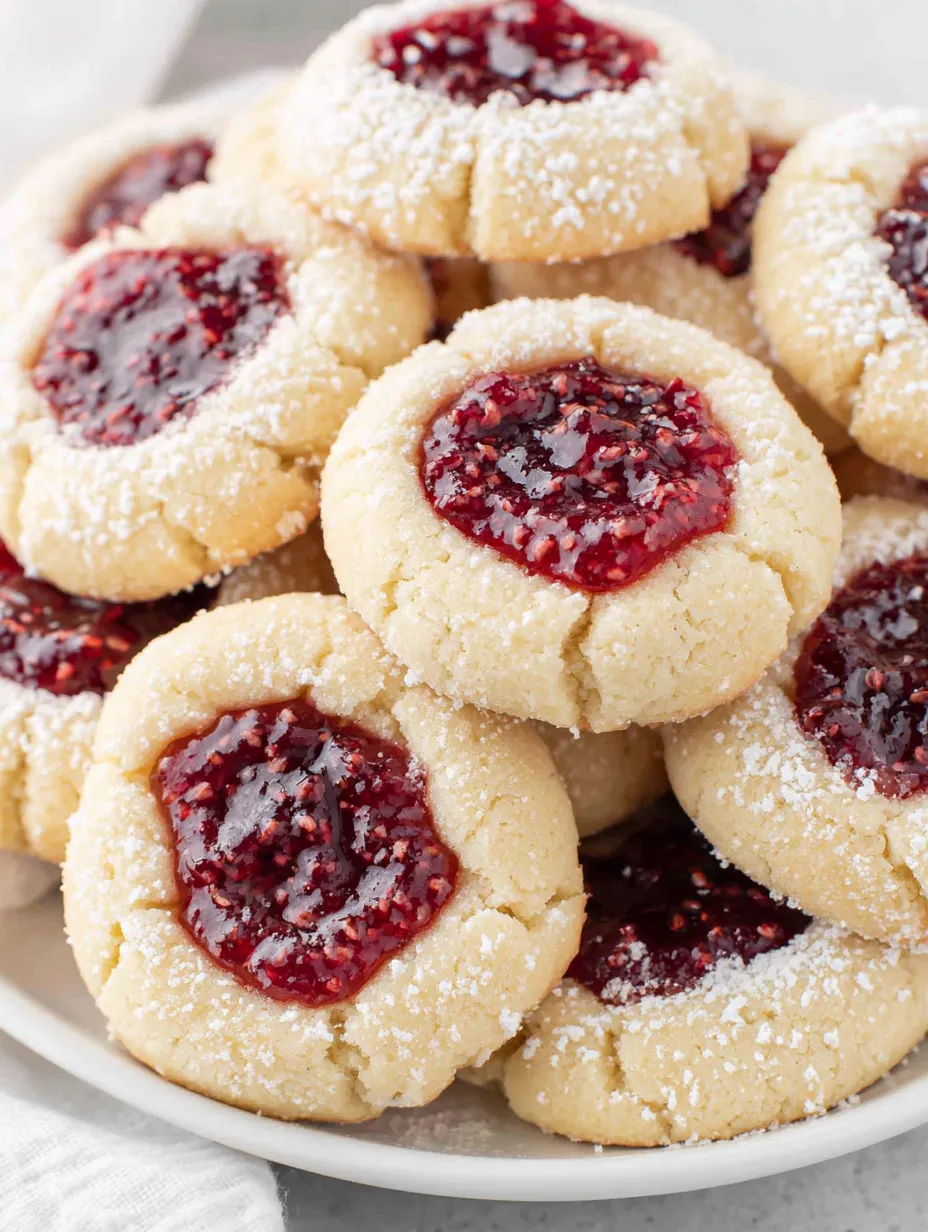
Raspberry jam thumbprint cookies have always been my go-to treat for bake sales and family gatherings. Their buttery, melt-in-your-mouth texture paired with sweet-tart raspberry preserves makes them impossible to resist and just a touch nostalgic. This recipe turns out the perfect batch every time and is simple enough for even beginner bakers to master.
I first made these cookies for a holiday party and watched as they disappeared within minutes. They are now my children’s number one requested cookie for any special occasion.
Ingredients
- Unsalted butter: Softens the cookies and adds rich buttery flavor Always use fresh high quality butter for best results
- Powdered sugar: Gives the cookies a delicate crumb and smooth sweetness Sift before using to avoid lumps
- Pure vanilla extract: Boosts the warmth and depth of the cookie flavor Opt for real vanilla for the best fragrance
- All purpose flour: Provides structure to hold the thumbprints Look for unbleached flour for a more tender texture
- Kosher salt: Balances sweetness and enhances all flavors Choose a fine grain for more even mixing
- Raspberry preserves: Brings a bright fruity center Select a thick preserve with lots of fruit pieces for the perfect filling
- Powdered sugar for topping: Adds a pretty finish and tiny bit of extra sweetness Dust with a fine sieve just before serving
Step-by-Step Instructions
- Cream the Butter and Sugar:
- Start by beating your softened butter with powdered sugar in a large mixing bowl. Use a paddle attachment if you have a stand mixer. This should take about three minutes on medium speed until the mixture looks pale and fluffy. Be sure to scrape down the sides of the bowl so everything gets evenly combined. Creaming the butter and sugar well is key to a delicate crumb.
- Add Vanilla Flour and Salt:
- Beat in your vanilla extract next then gradually mix in the flour and kosher salt. It will look crumbly at first but keep mixing until a dough forms into a loose ball. Do not overmix once the dough comes together. This gentle mixing prevents tough cookies.
- Chill the Dough:
- Cover the mixing bowl with plastic wrap and set it in the refrigerator. Let it chill for thirty minutes to firm up which makes shaping the cookies much easier. If your dough feels too hard to scoop after chilling let it rest at room temperature for about fifteen minutes.
- Shape and Fill the Cookies:
- Preheat your oven to three hundred fifty degrees Fahrenheit. Line a cookie sheet with parchment paper for easy cleanup. Scoop out the dough with a one tablespoon cookie scoop and gently roll each piece into a smooth ball about one inch wide. Arrange the balls on the baking sheet with even spacing. Make a deep indent in the center of each cookie using your thumb or the end of a wine cork. Spoon in half to one teaspoon of raspberry preserves into each indentation. If any edges of the dough crack just pinch them back together for a smooth finish.
- Bake and Cool:
- Place the cookie sheet in the oven and bake for twelve to fourteen minutes ideally until the bottoms are just turning golden. Be careful not to overbake so the cookies stay soft. Let the cookies cool on a wire rack before finishing with a light dusting of powdered sugar.
Raspberry preserves have always been my favorite because they provide a tart snap that balances the cookie’s sweetness. Every time I pull these cookies out of the oven it reminds me of baking with my grandma who never let a holiday pass without a fresh batch.
Storage Tips
Store your baked cookies in an airtight container in the refrigerator They will keep their flavor and texture for up to seven days Baked thumbprints can be frozen for up to three months Stack them between layers of parchment in a sturdy container If freezing the dough let it thaw slightly so you can easily scoop and shap
Ingredient Substitutions
If you do not have raspberry preserves try strawberry apricot or even a tart cherry preserve Avoid using jelly because it is too runny and can overflow in the oven For a gluten free option use a one to one flour blend suitable for baking
Serving Suggestions
Serve these cookies as part of an afternoon tea spread or on a holiday cookie platter I find them wonderful alongside a cup of black tea or homemade lemonade Their small size makes them perfect for lunchboxes or dessert trays for potlucks

Cultural and Historical Context
Thumbprint cookies are believed to have originated in Sweden where they are called hallongrotta meaning raspberry cave They became a classic in the United States especially around the holidays and are now a staple for Christmas cookie swaps and bake sales
Common Recipe Questions
- → What makes these cookies so soft and buttery?
The high ratio of softened butter creamed with powdered sugar results in a melt-in-your-mouth texture.
- → Can I use different preserves for the center?
Absolutely! Apricot, strawberry, or blackberry preserves also work beautifully. Avoid jelly, as it can bubble over.
- → How should I store these cookies?
Store the cookies in an airtight container in the refrigerator for up to 7 days. They also freeze well for longer storage.
- → Is it possible to make the dough ahead?
Yes, you can prepare the dough up to 24 hours ahead. Let it sit at room temperature before scooping, as it will firm up in the fridge.
- → Why do I need to chill the dough?
Chilling helps the dough hold its shape during baking and makes scooping and rolling easier.
- → How do I avoid cracks when shaping?
Pinch together any edges that crack after creating the thumbprint to keep each cookie neat and smooth.