
 Save
Save
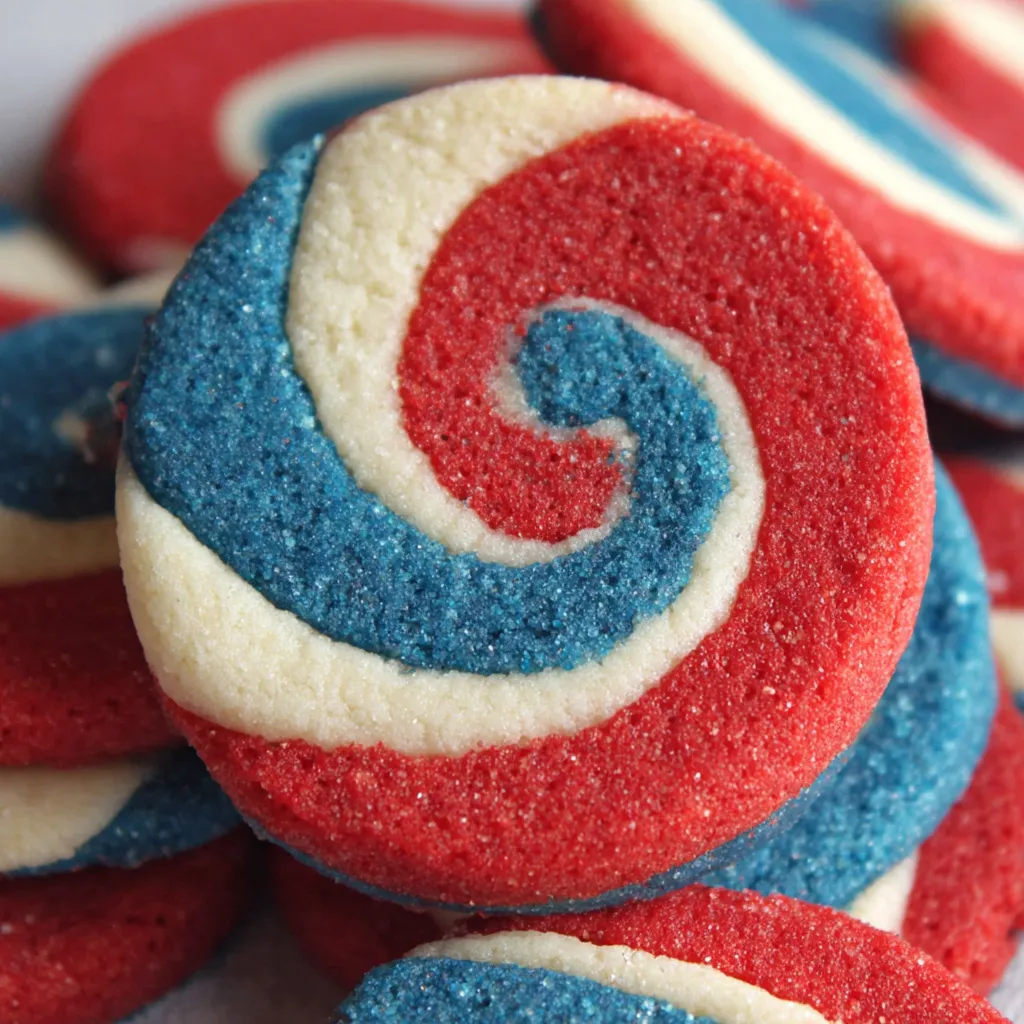
Red White and Blue Pinwheel Icebox Cookies bring a festive sparkle to any summer celebration and always disappear fast at the dessert table. With their bright colors and irresistible buttery vanilla taste these cookies are fun to make and even more fun to share especially for holidays like the Fourth of July.
I first made these for a July picnic when my nephew begged for red white and blue treats They have become our mustbake tradition and are always the first to go
Ingredients
- Allpurpose flour: gives the cookies their tender bite use fresh flour for best texture
- Baking powder: helps the cookies rise and prevents them from getting too dense always check its freshness
- Salt: balances sweetness and enhances the buttery taste opt for fine sea salt if possible
- Unsalted butter: brings rich flavor and soft crumb choose highquality butter for best results
- Sugar: gives sweetness and that signature chewy edge make sure it is fine regular granulated
- Large eggs: provide structure and help the dough come together choose farm fresh for richer flavor
- Vanilla extract: perfumes the dough and gives that homemade taste use pure vanilla not imitation
- Red and blue food coloring: delivers those bright colors gel food coloring works best for vibrant swirls
StepbyStep Instructions
- Make the dry mix:
- Sift together allpurpose flour baking powder and salt in a medium bowl to break up any lumps and evenly distribute the leavening
- Cream butter and sugar:
- In the bowl of a stand mixer beat unsalted butter until creamy and smooth about two minutes then add sugar and continue beating until light and fluffy around three minutes
- Blend in eggs and vanilla:
- Beat in eggs one at a time letting each incorporate fully before adding the next Pour in vanilla and mix until smooth
- Form the dough:
- Add the flour mixture to the wet ingredients and mix on low just until combined Take care not to overmix for tender cookies
- Divide and color the dough:
- Split dough into three equal pieces Shape each into a four by four inch square Wrap each in plastic Chill the white dough while you tint one piece red and one blue returning each to the fridge after coloring and cleaning the mixer bowl in between
- Chill the doughs:
- Refrigerate all three dough colors for thirty minutes to make rolling easier
- Roll out the layers:
- Slice each dough square in half so you have two smaller rectangles per color Roll each into even rectangles about one eighth inch thick using wax paper to prevent sticking
- Layer and roll the pinwheel log:
- Stack red then white then blue dough strips on top of each other Peel away wax paper as you go and keep layers even Lightly roll together so the layers bond Roll up the stacked dough tightly from the short end to make a log Repeat with remaining dough pieces
- Chill the pinwheel logs:
- Wrap logs tightly first in wax paper then in plastic wrap Refrigerate for at least one hour for clean slicing Rotate the logs or stand them in glasses so they stay round Chill for at least four more hours so they are firm
- Slice and prepare for baking:
- Preheat oven to three hundred fifty degrees Place rounds of dough about two inches apart on lined baking sheets to leave room for spreading
- Bake the cookies:
- Bake each batch nine to eleven minutes until just set and pale golden Move to a cooling rack right after baking so they stay tender
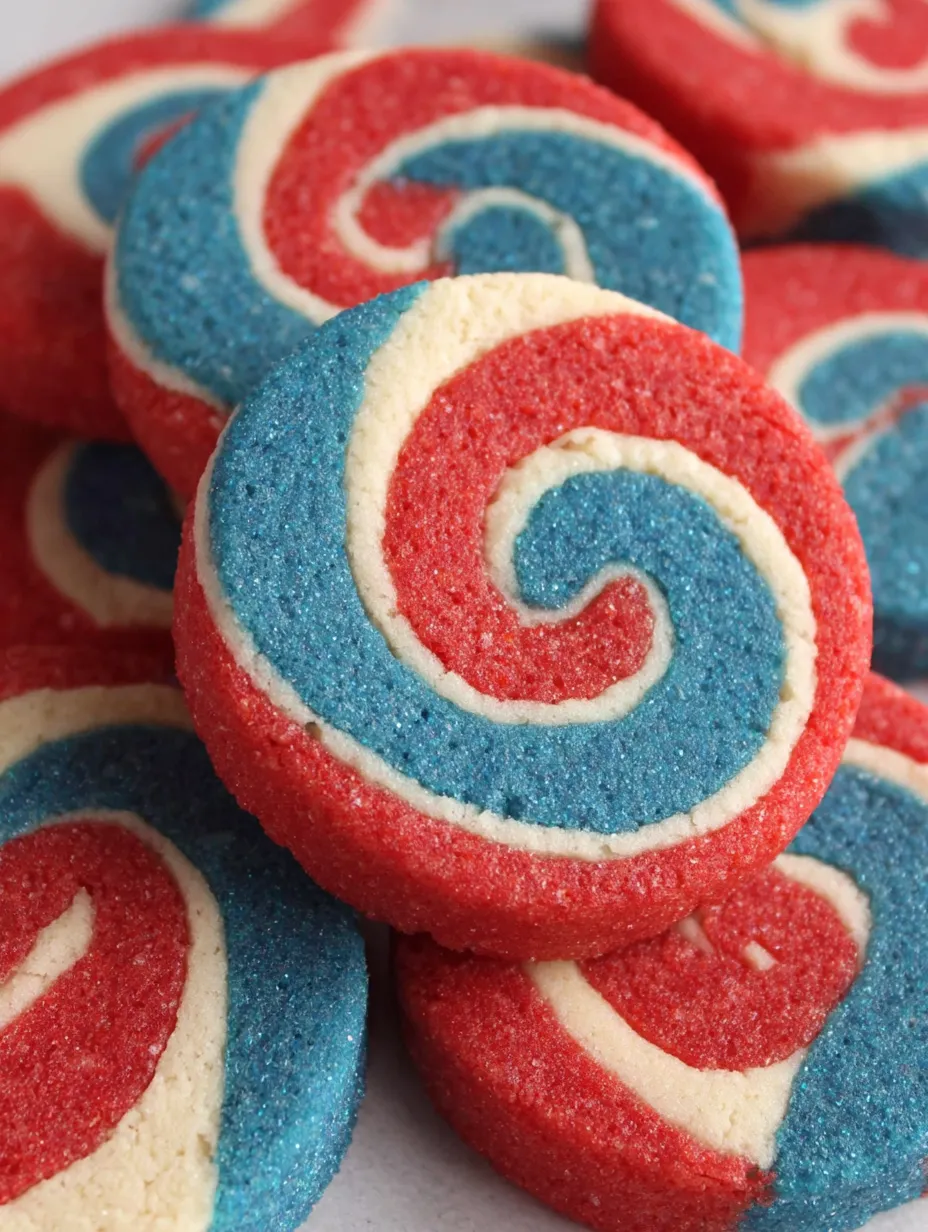
My favorite part is revealing the colorful swirl in every slice I still remember my niece’s delight when she saw the first pan baked and she insisted we make two batches every summer since
Storage Tips
Keep these cookies in an airtight tin at room temperature for up to four days For longer storage stash the baked cookies or sliced dough rounds in the freezer Layer parchment between each so colors stay sharp and cookies do not stick together If baking frozen rounds add one more minute to the bake time and watch closely
Ingredient Substitutions
You can swap in natural food colorings if you prefer or use paste food colors for intense hues For dairyfree cookies use margarine instead of butter but watch the dough texture carefully Almond or lemon extract can be swapped for vanilla for a new flavor twist
Serving Suggestions
These cookies look beautiful piled high on a festive dessert tray Serve with a bowl of fresh berries or alongside a scoop of vanilla ice cream at your barbecue Stack cozy bundles of them in cellophane bags and tie with ribbon for a patriotic party favor

A Bit of History
Icebox cookies took off in the early twentieth century when home refrigerators made makeahead dough possible Swirled designs like pinwheels became classic for celebrations Their playful stripes and soft crumb keep them a favorite across generations and potluck tables
Common Recipe Questions
- → How do I achieve vibrant red and blue swirls?
Use gel or concentrated liquid food coloring to ensure bold, distinct colors in the dough layers without affecting texture.
- → Can I prepare these cookies in advance?
Yes, the dough logs can be refrigerated for up to 2 days or frozen for a month. Slice and bake as needed.
- → What’s the best way to prevent the dough from sticking?
Roll out the dough between sheets of wax paper, and chill it well before layering and shaping to avoid sticking.
- → Why is chilling the dough important?
Chilling firms up the dough, making it easier to slice and helping the cookies maintain their distinct swirls during baking.
- → Can I substitute the food coloring?
If desired, natural food colorings can be used, though colors may be less intense than with conventional options.
- → How do I ensure even baking?
Place cookie rounds evenly spaced on lined baking sheets and bake until pale golden, rotating trays if necessary for uniformity.