
 Save
Save
Stained glass cookies are like edible holiday ornaments and have been a showstopper on my cookie platters for years Every time I bake a batch the kitchen fills with the sweet scent of butter and vanilla while colorful melted candies glow at the heart of each cookie These cookies are a joy to make with my kids during the holidays especially since everyone loves picking their favorite candy colors
Every time I bring these to a cookie exchange they disappear almost instantly I will never forget the year my daughter carefully selected only blue candies for her batch just because Elsa is her favorite
Ingredients
- All purpose flour: helps the cookies keep their shape for delicate windows go for a fresh bag for best results
- Baking powder: gives the dough just a little lift resulting in a tender bite always check it is active
- Kosher salt: balances the sweetness and highlights all the flavors I prefer kosher for a clean finish
- Unsalted butter: at room temperature brings rich flavor and perfect texture choose high quality butter for the best taste
- Granulated sugar: sweetens the dough and creates spread use fine crystals for even mixing
- Large eggs: bind the dough and add richness always use room temperature eggs for easy blending
- Pure vanilla extract: infuses warmth and depth into both dough and aroma pick real extract for more flavor
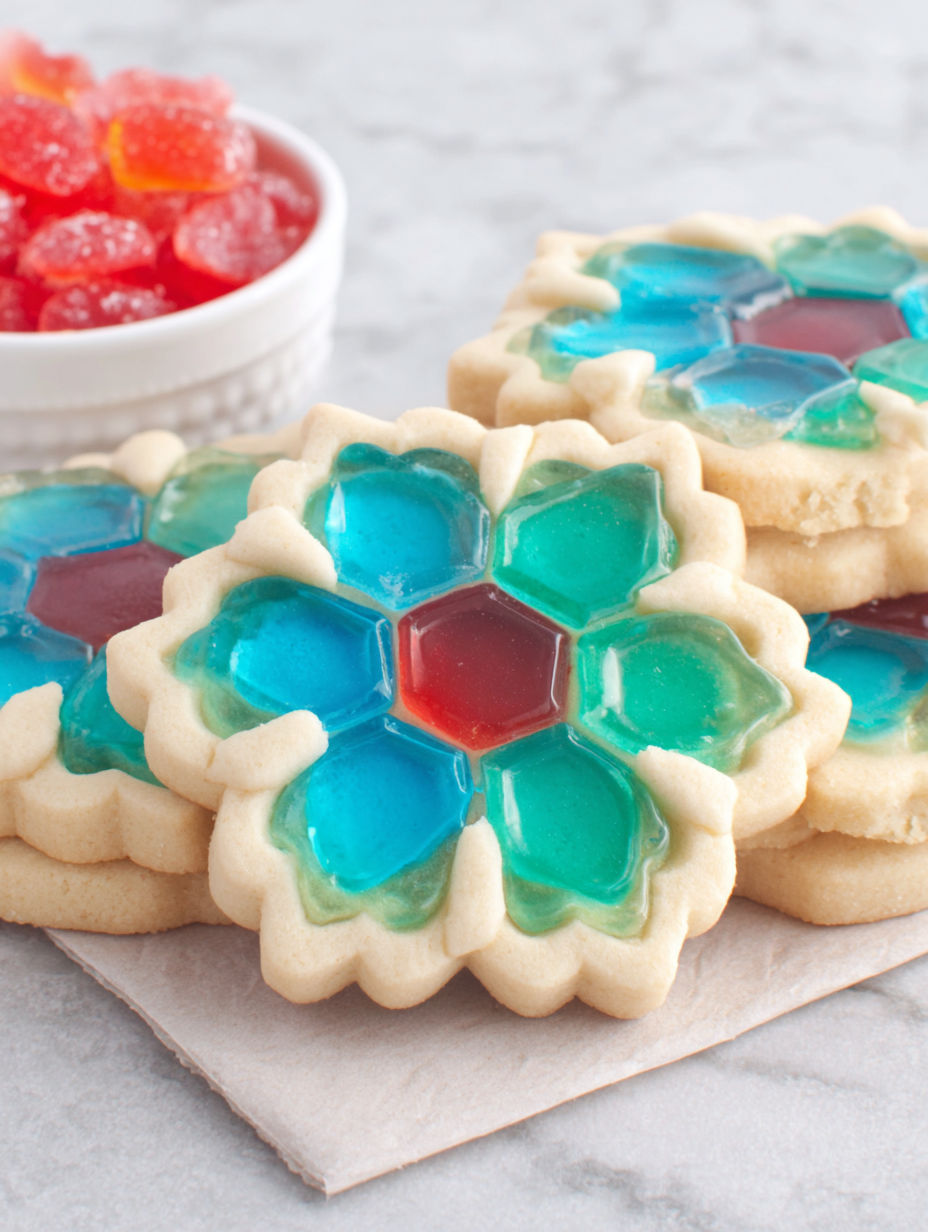
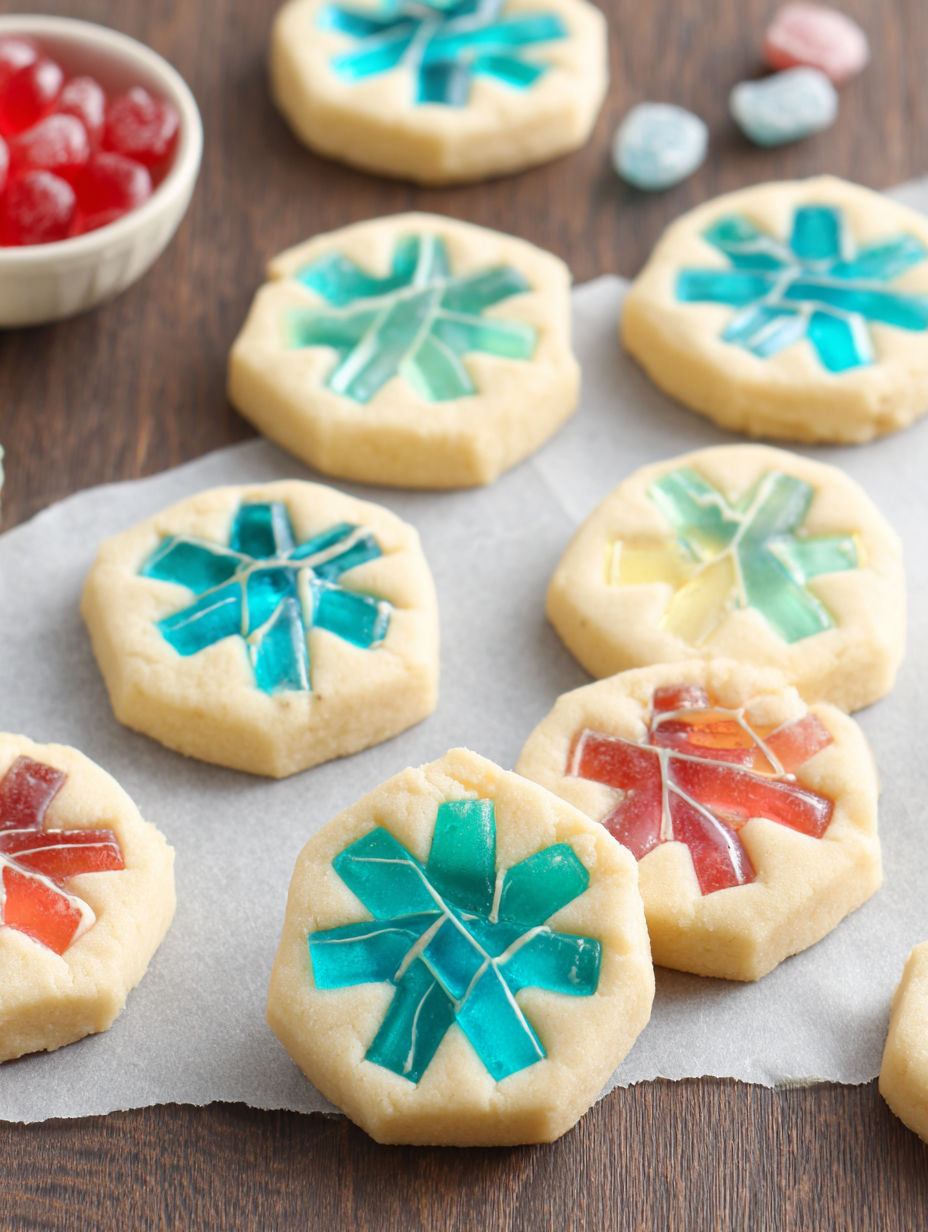
- Jolly Rancher candies: become the stained glass at the center brighter colors will look best crush just before using for freshness
- Clear coarse sanding sugar: adds extra sparkle to the tops pick a decorating sugar without dyes for maximum clarity
Instructions
- Prepare the Baking Sheet:
- Line a large baking sheet with parchment paper or use a silicone mat for easy removal and less sticking
- Mix Dry Ingredients:
- In a medium mixing bowl whisk flour baking powder and kosher salt until there are no streaks this base ensures even cookies
- Cream Butter and Sugar:
- Blend the unsalted butter and granulated sugar using a mixer until the mixture is very light and fluffy Take your time with this step for crisp edges
- Add Eggs and Vanilla:
- Lower the mixer speed and blend in the whisked eggs and pure vanilla extract mix until just incorporated for smooth dough
- Combine Wet and Dry Ingredients:
- Gradually add the flour mixture to the wet ingredients using the mixer on low mix just until combined too much mixing toughens the cookies
- Chill the Dough:
- Shape the dough into a rectangle on plastic wrap seal well and refrigerate for one hour This resting step keeps your cookies from spreading
- Crush the Jolly Ranchers:
- Unwrap and separate candies by color Crush each color into small pieces using a rolling pin and keep each color in a separate bowl
- Roll Out the Dough:
- Divide chilled dough in half Lightly flour your countertop Roll dough out to about a quarter inch thickness roll as evenly as possible for uniform baking
- Cut the Cookies:
- Use a large cookie cutter to cut shapes then remove centers with a small cutter Save the inner dough scraps for rerolling
- Fill the Centers:
- Place cookies on the baking sheet Fill each cutout about three quarters full with crushed Jolly Ranchers this prevents overflowing as it melts
- Chill Before Baking:
- Sprinkle the cookies with clear sanding sugar and chill the baking sheet for fifteen minutes so cookies keep their shape
- Bake the Cookies:
- Preheat oven to three hundred fifty degrees F Bake for eight to ten minutes Look for candy to be melted and bubbling and edges just turning golden
- Cool Completely:
- Let cookies cool fully on the baking sheet until candy centers harden and cookies feel sturdy Only move them when everything is cool
Every bite is a blend of buttery cookie and hard candy crunch My favorite part is watching the candies melt into glossy pools as the cookies bake I still remember the first time I made them with my mom and we could not stop peeking through the oven window at the melting colors
Storage Tips
Keep cookies in a single layer in an airtight tin for up to one week Humidity can make the candy centers sticky so avoid stacking unless separated by parchment For longer storage freeze baked cookies between sheets of wax paper
Ingredient Substitutions
If you do not have Jolly Ranchers any translucent hard candy like Life Savers or lollipops can work Be sure to pick bold colors for the clearest glass look You can use plant based butter and egg substitutes if needed though the flavor might change slightly
Serving Suggestions
Arrange on a holiday platter with other cookies for a stunning display Thread ribbon through cooled cookies and hang as edible ornaments Pair with hot chocolate for a festive after dinner treat
Cultural and Historical Context
Stained glass cookies are inspired by the tradition of making edible holiday ornaments They mimic the look of cathedral stained glass windows and are a popular activity during Christmas baking parties Many families have their own take using local candies for the center
Seasonal Adaptations
Use red and green candies for Christmas or pink and purple for Valentine treats Cut cookies in star snowflake or heart shapes to match any occasion Swap vanilla extract for almond or orange for flavor twists
Success Stories
Once my nephew made a batch using all yellow candies and called them sunshine cookies We also had a friend who mailed them as edible holiday cards with personalized messages cut into the cookies Everyone who makes these finds them as delightful to eat as they are to share
Freezer Meal Conversion
Shape dough and cut cookies then freeze unbaked on trays until solid Store in bags and bake straight from frozen just add a minute or two Crushed candy can be held in bags at room temperature for quick assembly
Stained glass cookies are as beautiful as they are delicious With a few simple tricks you can make a batch that will delight everyone this season
Common Recipe Questions
- → How do you keep the candy centers clear and smooth?
Make sure to crush the Jolly Ranchers finely and do not overfill the centers. Allow the cookies to cool completely on the baking sheet for the candy to set smoothly.
- → Can I use other hard candies instead of Jolly Ranchers?
Yes, any clear hard candy can be used, such as Life Savers. Choose your favorite flavors and colors for variety.
- → How do you keep the cookie dough from sticking?
Lightly flour your countertop and rolling pin. If the dough becomes too soft, chill it briefly before rolling again.
- → What's the best way to remove the centers of the cookies?
Use a small round cookie cutter, a bottle cap, or a sharp knife to carefully remove the centers from each cookie shape.
- → How should I store these cookies after baking?
Store the cooled cookies in an airtight container, with parchment between layers, to prevent sticking and preserve texture.