
 Save
Save
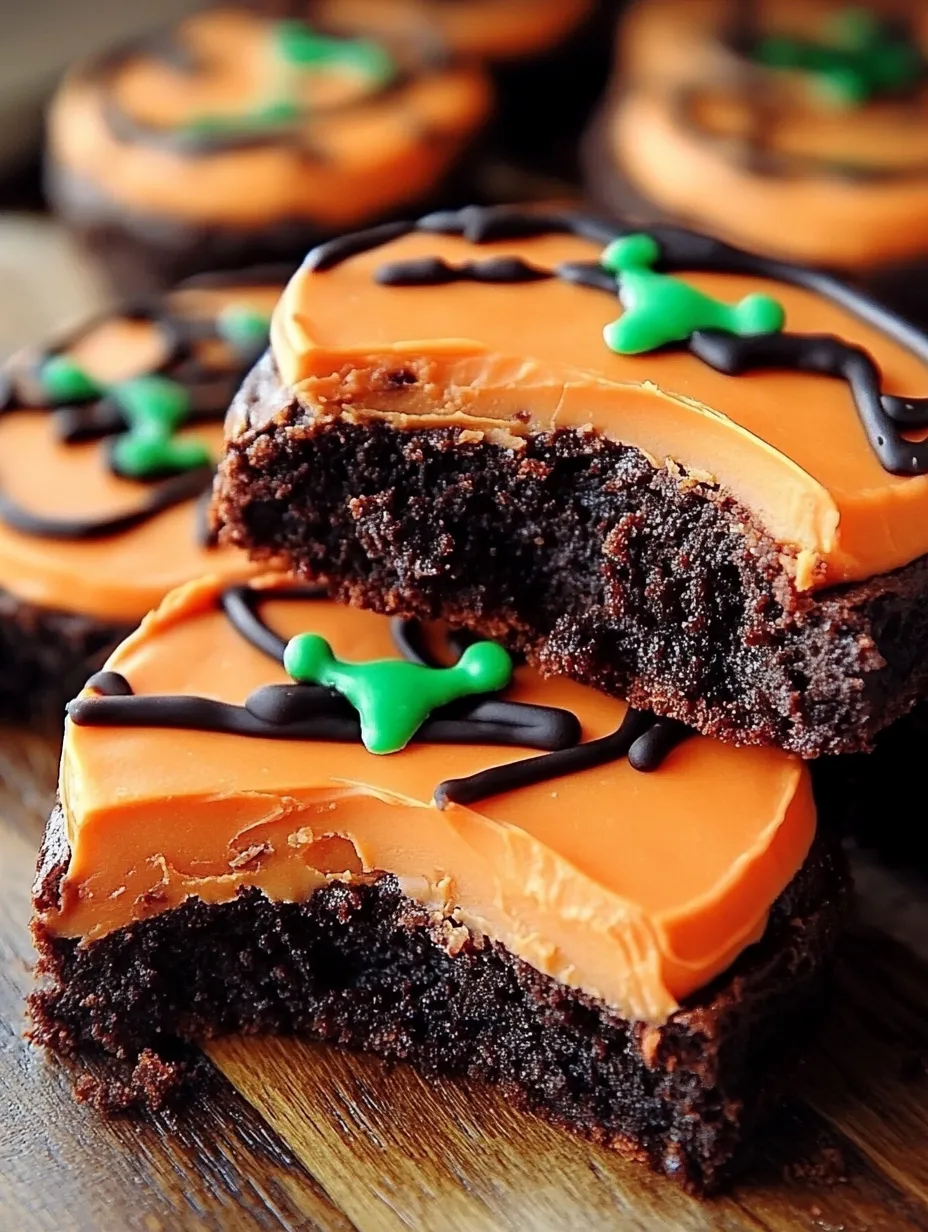
These adorable Halloween pumpkin brownies transform classic fudgy brownies into a festive treat perfect for your Halloween party or fall gathering. The hidden Oreo cookies create a delicious surprise inside while the decorated pumpkin shapes bring seasonal charm to your dessert table.
I first made these for my niece's Halloween party last year, and the kids went wild creating different jack-o-lantern expressions. Now it's become our annual tradition to gather around the kitchen island and decorate these together.
Ingredients
- Butter: Adds richness and helps create that perfect brownie texture
- Plain yogurt: Keeps the brownies moist while reducing some of the fat
- Sugar: Balances the cocoa and creates the characteristic crackly top
- Vanilla: Enhances the chocolate flavor without overpowering
- Eggs: Provide structure and richness to the brownie base
- All purpose flour: Gives just enough structure without making them cakey
- Baking soda: Helps the brownies rise slightly for the perfect texture
- Cocoa powder: Provides deep chocolate flavor throughout
- Salt: Enhances all the flavors and balances the sweetness
- Bittersweet chocolate chips: Create pockets of intense chocolate flavor
- Oreo cookies: Create a fun surprise center in each brownie
- Orange candy melts: For the pumpkin color coating
- Green candy melts: For creating realistic stems
- Dark chocolate: For piping the jack o lantern faces
Step-by-Step Instructions
- Preheat the Oven:
- Set your oven to 350°F and prepare a 9×9 baking pan by lining it with parchment paper or greasing it thoroughly to prevent sticking.
- Mix the Base Ingredients:
- Combine butter, yogurt, sugar, and vanilla in a large bowl, mixing until well incorporated. Add the eggs one at a time, mixing well after each addition until the mixture looks smooth and slightly fluffy.
- Add Dry Ingredients:
- Sift together the flour, baking soda, cocoa powder, and salt, then gently fold into the wet ingredients. Mix just until no dry streaks remain being careful not to overmix which can make brownies tough.
- Add Chocolate Chips:
- Fold in the bittersweet chocolate chips until evenly distributed throughout the batter. The chips will create pockets of melted chocolate in the finished brownies.
- Pour and Add Oreos:
- Transfer half the brownie batter to the prepared baking pan, spreading it evenly. Place the Oreo cookies in a pattern that will allow you to cut around them later when making the pumpkin shapes. Cover completely with the remaining brownie batter.
- Bake to Perfection:
- Bake for approximately 35 minutes or until a toothpick inserted comes out with a few moist crumbs. Immediately upon removing from the oven, gently press down on the surface with a spatula to create a more dense, fudgy texture.
- Cool and Shape:
- Allow the brownies to cool completely in the pan before lifting out and cutting into pumpkin shapes. Use a pumpkin cookie cutter if available, or carefully cut freehand with a sharp knife.
- Decorate:
- Melt the orange candy melts according to package directions and spread over each pumpkin brownie. Use an offset spatula to create texture lines resembling a real pumpkin. Add melted green candy for stems and pipe melted dark chocolate to create jack o lantern faces.
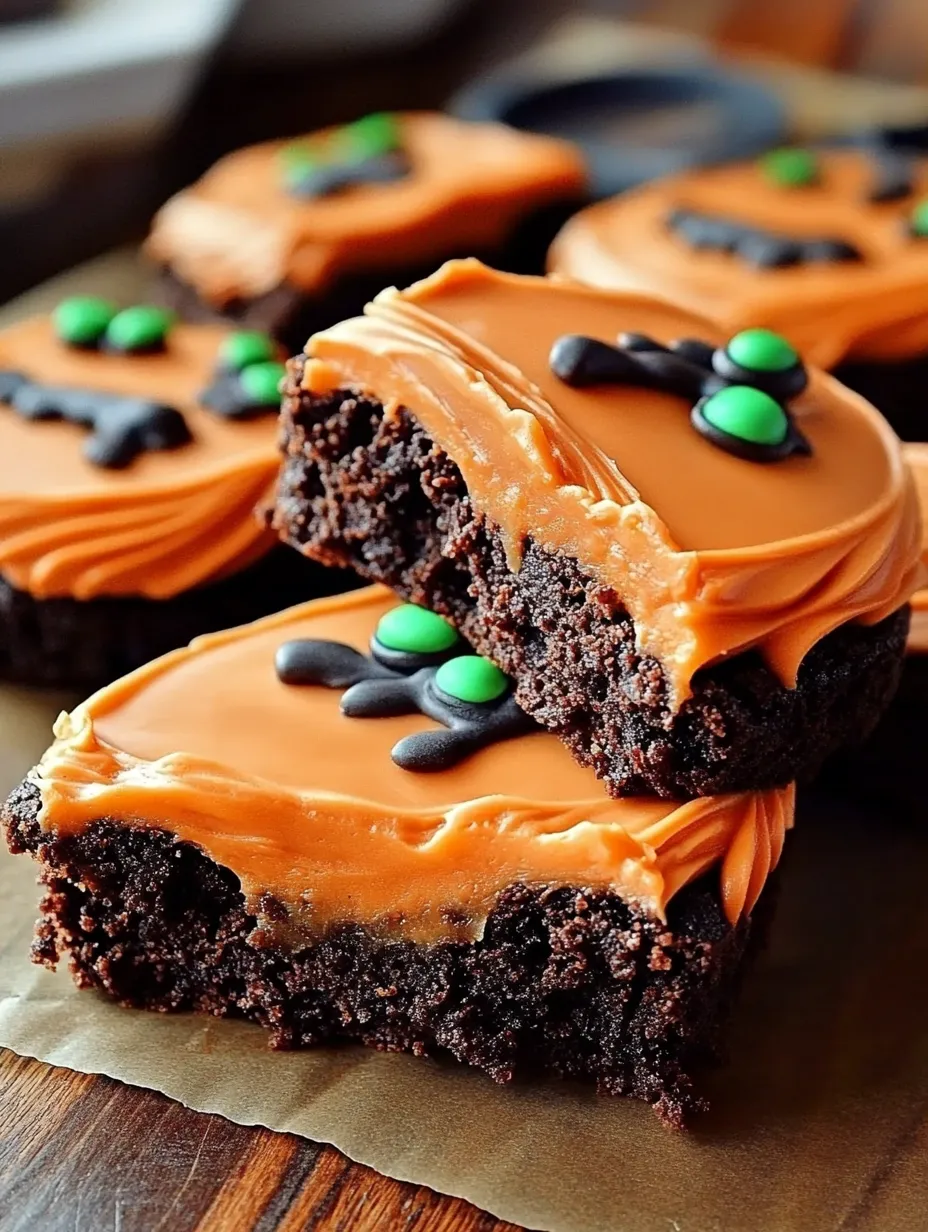
The bittersweet chocolate chips are my secret weapon in this recipe. I discovered that using bittersweet rather than semisweet creates the perfect balance with the sweet orange coating. My family gathers around the kitchen island every October to decorate these, and each year the faces get more creative.
Make Ahead Options
These Halloween pumpkin brownies can be prepared in stages if you're short on time. Make the brownie base up to two days before your event and store well wrapped at room temperature. You can even cut them into shapes a day ahead, then decorate a few hours before serving for the freshest appearance. The decorated brownies actually taste better the day after making as the flavors have time to meld together.
Decorating Variations
While the classic jack o lantern faces are traditional, you can customize these brownies in countless ways. Try making friendly pumpkin faces for younger children or create spooky expressions for older kids and adults. You can also use white chocolate to create ghost shapes, green chocolate for witch faces, or purple for cat silhouettes. Let your Halloween imagination run wild!
Serving Suggestions
These festive brownies make a stunning centerpiece on a Halloween dessert table. Arrange them on a black platter surrounded by candy corn and autumn leaves for maximum impact. For a special presentation, serve each brownie with a scoop of vanilla ice cream and a drizzle of caramel sauce. They also pair wonderfully with hot apple cider for a complete fall dessert experience.
Storage Tips
Keep your decorated pumpkin brownies in an airtight container at room temperature for up to 4 days. Place pieces of parchment paper between layers to prevent the decorations from sticking together. If your kitchen is warm, refrigerate them but bring to room temperature before serving for the best flavor and texture. These brownies also freeze beautifully before decorating just thaw completely before adding the candy coating.
Common Recipe Questions
- → How do I achieve the chewy texture?
To achieve a chewy texture, gently press the brownies down right after baking while they're still warm. This helps create a dense, fudgy consistency.
- → Can I substitute yogurt with something else?
Yes, you can substitute the plain yogurt with sour cream or even additional butter for a richer texture.
- → What type of chocolate chips work best?
Bittersweet chocolate chips are ideal for this recipe as they balance the sweetness of the brownie batter.
- → How do I melt chocolate for decorations?
Melt chocolate in a microwave-safe bowl, heating it in 15-second intervals, stirring in between to avoid burning.
- → Can I use store-bought icing for decoration?
Yes, store-bought icing is an easy alternative for decorating the pumpkin brownies if you're short on time.