
 Save
Save
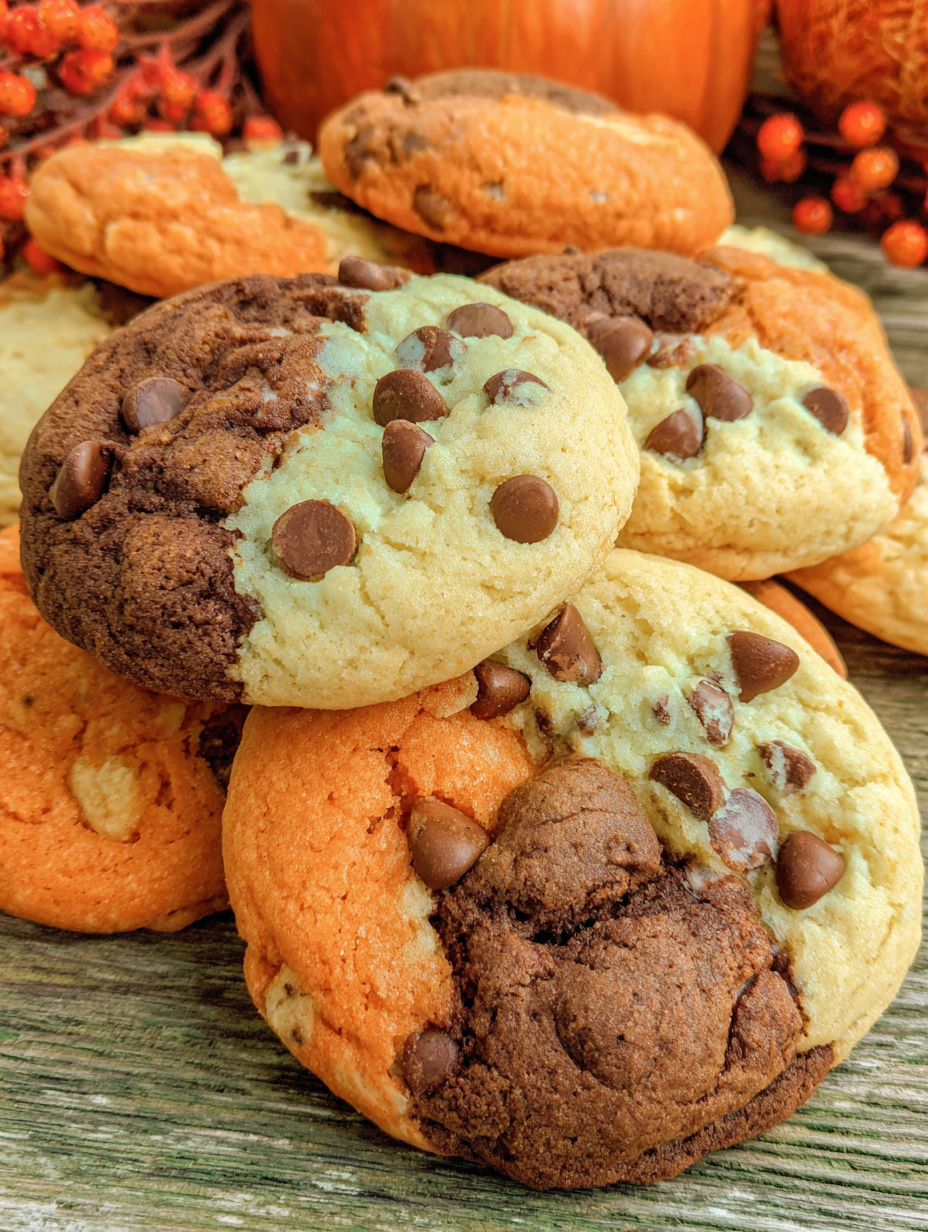
These Harvest Marble Chocolate Chip Cookies bring a festive twist to the classic chocolate chip cookie with gorgeous autumn colors and irresistible chocolate in every bite. They are just right for Thanksgiving dessert trays or cozy fall afternoons with hot apple cider.
Once I tried these for a Thanksgiving potluck and everyone asked how the marbling was done—no two cookies look exactly alike and that always brings a smile.
Ingredients
- Sweet cream butter at room temperature: gives rich flavor and creates that soft chewy texture use good quality salted butter for depth
- Granulated sugar and brown sugar: both are needed so your cookies get the right balance of sweetness plus a hint of caramel from the brown sugar choose light brown sugar for a gentle molasses note
- Large eggs: provide moisture and binding for the dough grab extra fresh eggs for the best rise
- Pure vanilla extract: for warmth and dimension go for real vanilla instead of imitation for a richer cookie
- Baking soda: is the leavening hero ensure it is fresh so cookies rise beautifully
- Fine salt: sharpens all the flavors and balances sweetness
- All purpose flour: is the sturdiest base sift before using for perfect texture and no lumps
- Nestle Toll House chocolate chips: these melt into gooey ribbons in the warm cookies choose semi-sweet or milk chocolate based on your preference
- Gel food coloring in orange and brown: for the festive marbled look use gel for vibrant color without watering down the dough
Instructions
- Cream the Butters and Sugars:
- Start by beating your room temperature butter in the mixing bowl until light and fluffy. Blend in both sugars for two minutes to dissolve them fully so your cookies turn out tender with a subtle caramel note.
- Mix in Eggs and Vanilla:
- Add the eggs one at a time and beat well after each addition. Pour in the vanilla and keep mixing until the dough is pale and thick. This is the secret to a chewy interior.
- Add Dry Ingredients:
- Sprinkle in the baking soda and salt then mix until combined. Gradually add the flour just one third at a time and blend until no white streaks remain. Overmixing can make cookies tough so stop as soon as the dough is incorporated.
- Divide and Color the Dough:
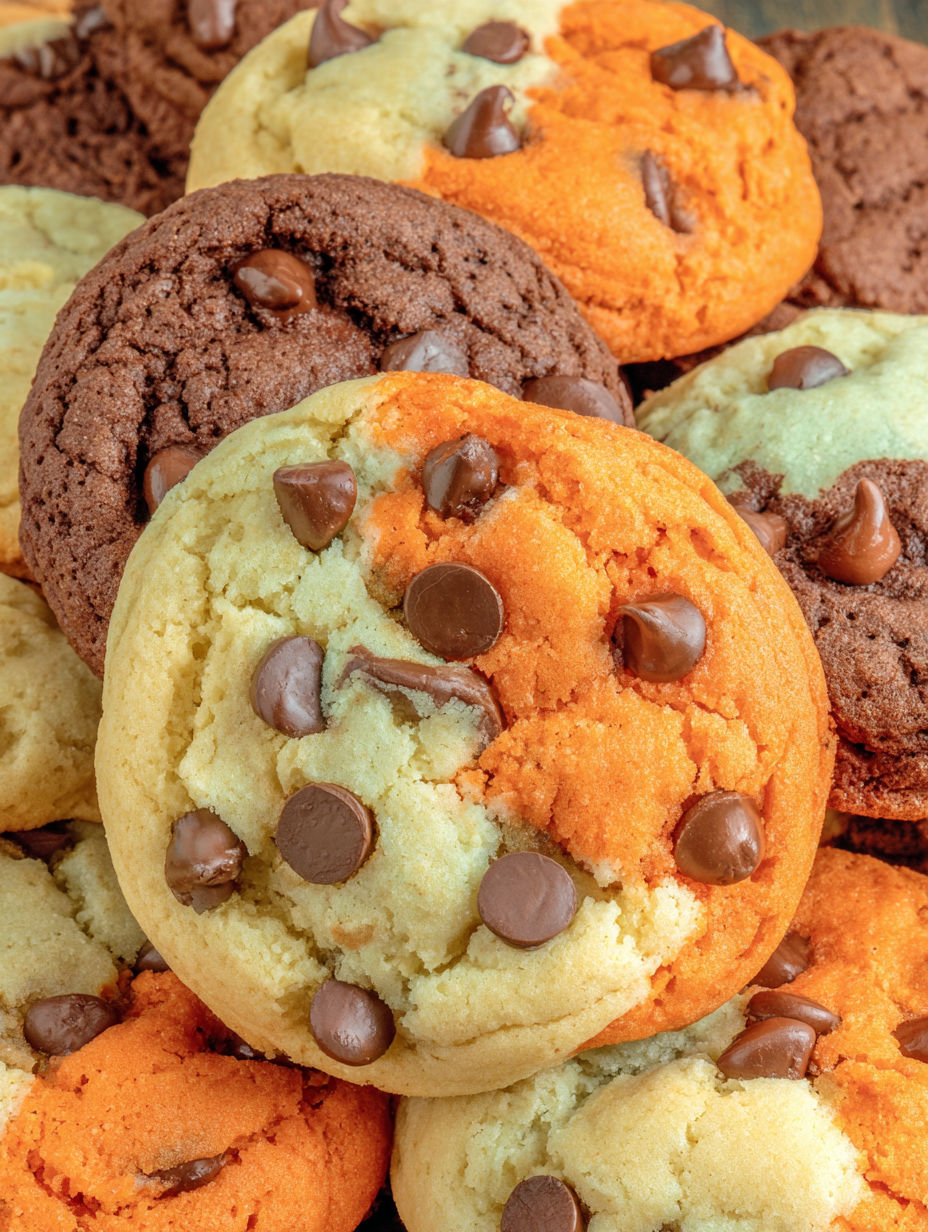
- Separate your dough into three even bowls. Tint one with orange gel color and one with brown. Leave the third portion plain for a true marble effect. Use a spatula or gloved hands to blend the color in gently.
- Mix in Chocolate Chips:
- Scatter a generous handful of chocolate chips into each portion then gently fold them in. This ensures ribbons of chocolate through every bite of every colored dough.
- Shape the Marble Cookie Balls:
- Pinch off pieces of orange white and brown dough then lightly press them together to form a ball a touch larger than a golf ball. Do not overmix or the marbling will blend. Place on a parchment lined baking sheet with two inches between each cookie.
- Press and Bake:
- Gently flatten each cookie ball so the colors are visible across the top. Bake at 375 degrees for 8 to 10 minutes. Look for edges just turning golden and centers still a touch soft. They will set as they cool.
My favorite part is creating the swirls with my kids. Every batch has a different pattern and sometimes we see leaves or pumpkins in them. These cookies have become our family bake night tradition during fall.
Storage Tips
Store fully cooled cookies in an airtight tin at room temperature and they will stay soft and fresh for up to four days. For longer storage you can freeze the entire batch sealed in freezer bags—just let them thaw at room temperature before serving for best texture.
Ingredient Substitutions
You can swap in dark chocolate chips for a deeper cocoa flavor or white chocolate chips for extra autumn flair. If you are out of brown sugar try coconut sugar for a warm molasses vibe.
Serving Suggestions
Pile these cookies high on a rustic wooden board for a fall party centerpiece. They are lovely with spiced tea or apple cider. Sometimes I sandwich vanilla ice cream between two for a special treat.
Cultural and Holiday Inspiration
These cookies are inspired by the cozy baking traditions of Thanksgiving and fall harvest time. The orange and brown colors reflect changing leaves and autumn’s gentle glow. I love tying a few in cellophane bags with twine to give as hostess gifts or lunchbox surprises.
Seasonal Adaptations
For Halloween use black and purple gel coloring. Add a few pumpkin spice chips for a twist. Try pastel marbling in spring for Easter.
With their festive colors and gooey chocolate these cookies are the hit of every fall gathering. Make a batch for your next celebration and watch them disappear.
Common Recipe Questions
- → How do I achieve vibrant marble colors?
Divide the dough into three portions and use food coloring to tint one orange, one brown, and leave the last plain. Gently combine for a marbled effect without over-mixing.
- → Can I substitute the chocolate chips?
Absolutely! Try butterscotch chips, white chocolate chips, or a mix of your favorite varieties for a different flavor profile.
- → What type of butter should I use?
Salted sweet cream butter works best for these cookies, adding richness and depth to the dough.
- → How do I keep the cookies soft?
Be careful not to over-bake; remove the cookies when the edges just start to turn golden for the softest texture.
- → Can I make the dough ahead of time?
Yes, the dough can be prepared in advance and stored in the refrigerator for up to two days before baking.