
 Save
Save
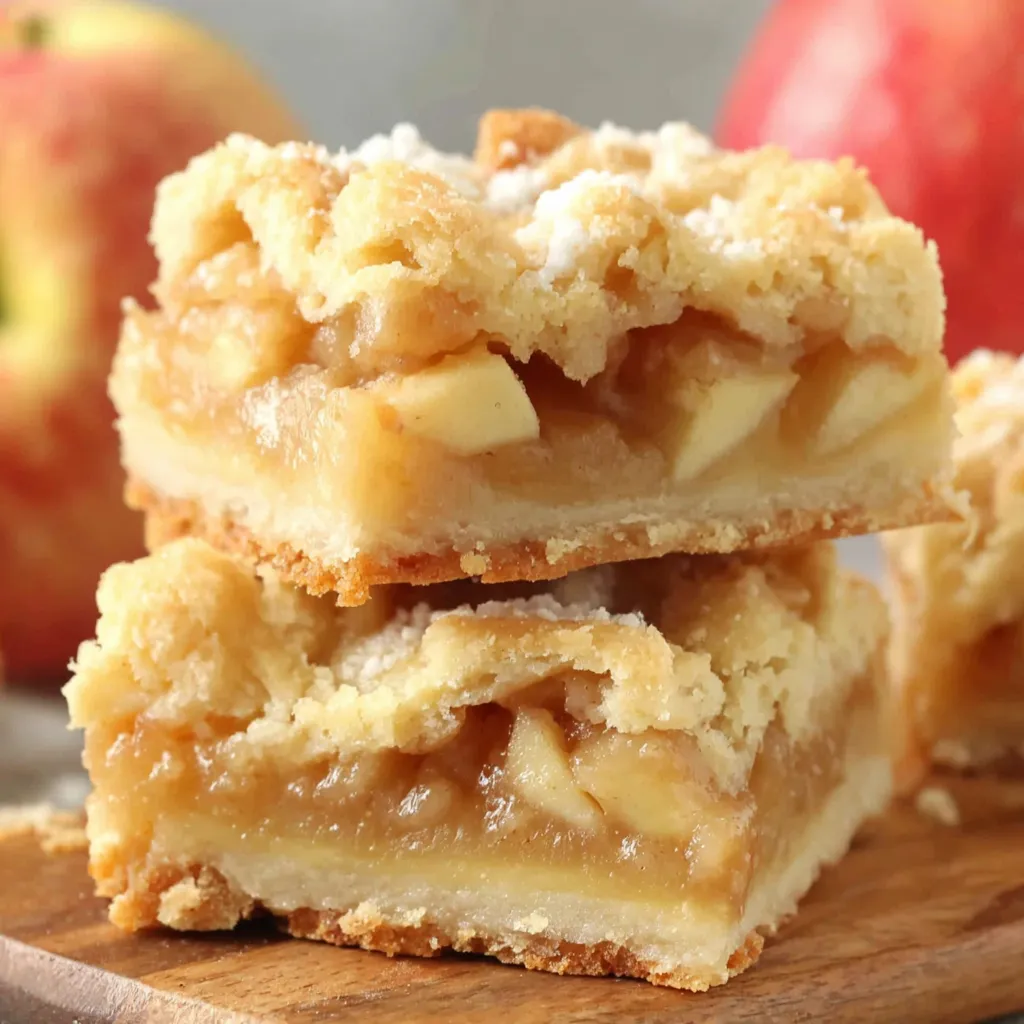
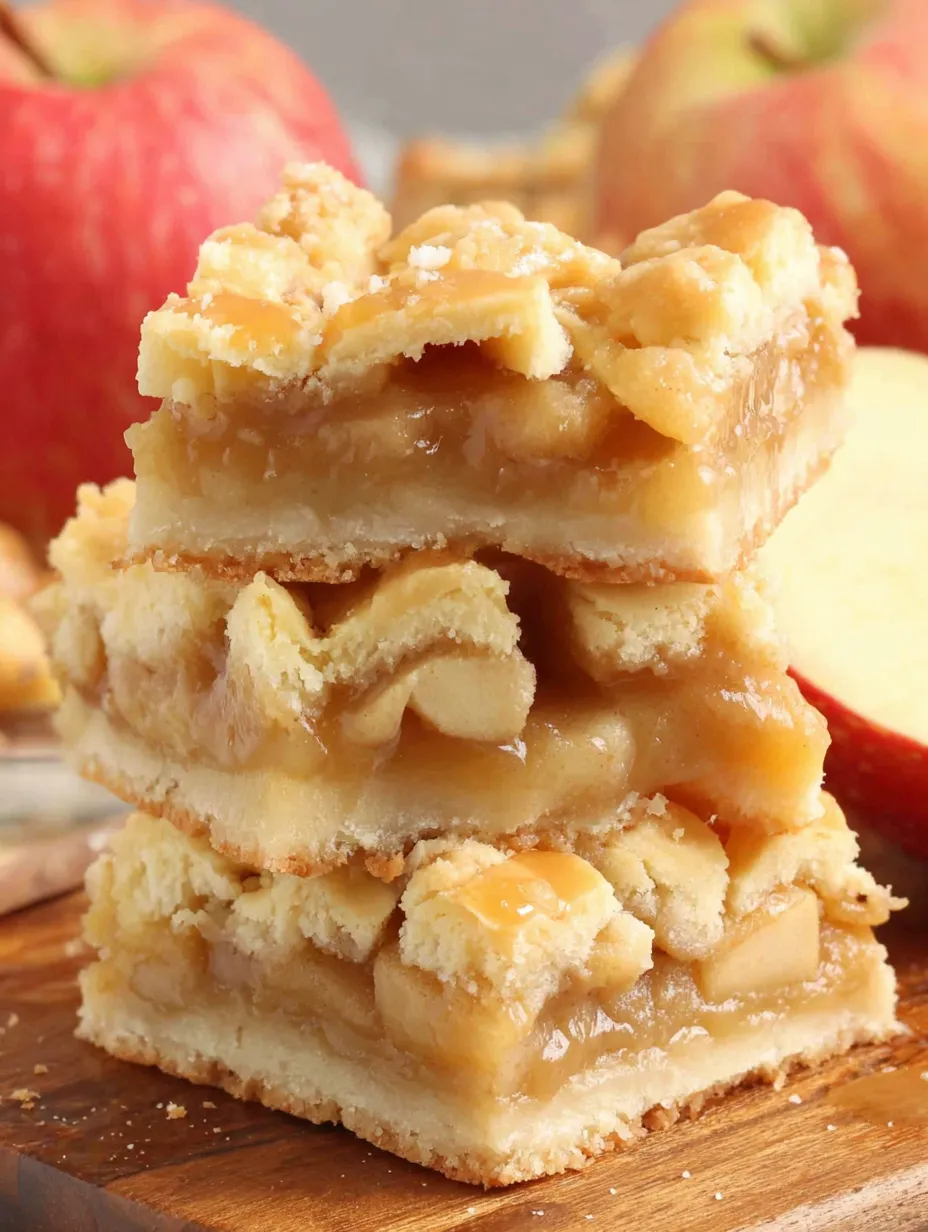
These homemade apple bars are a bite of autumn wrapped in a buttery, flaky crust and bursting with sweet apple flavor. Nothing rivals the aroma of cinnamon and apples baking together and this treat is special enough to take to gatherings yet easy enough for a cozy afternoon.
This apple bar recipe has become our family favorite in the fall. I remember baking it with my grandmother on chilly weekends and now I share the tradition with my own kids.
Ingredients
- All purpose flour: essential for a tender yet sturdy crust choose a fresh bag for best texture
- Shortening: makes the crust incredibly flaky and light I always use a high quality brand for best results
- Salt: balances the sweetness and enhances flavors I prefer a fine sea salt for even seasoning
- Egg yolk: enriches the dough so the crust bakes up with a lovely golden hue
- Milk: brings the dough together and keeps the crust moist opt for whole milk if possible
- Apples: the star of the recipe choose firm tart apples like Granny Smith or Jonagold for balance and structure
- White sugar: sweetens the filling and caramelizes during baking pick granulated white for even distribution
- Cinnamon: brings warmth and coziness to the apple filling always use ground cinnamon from a fresh container
- Tapioca: absorbs extra juice so the bars stay crisp and never soggy small pearl or instant tapioca both work
- Egg white: brushed on top creates a shiny crisp finish
- Extra white sugar: on top adds sparkle and a subtle crunch
Step-by-Step Instructions
- Prepare the Crust:
- Blend the flour shortening and salt in a large bowl using a pastry cutter or your hands until the mixture resembles coarse meal. This ensures you will have a flaky crust with delicate layers.
- Combine Wet Ingredients:
- In a small bowl whisk together the egg yolk and milk until completely blended. You want a smooth mixture without streaks.
- Form the Dough:
- Pour the egg yolk mixture into the flour blend. Use your hands or a sturdy spoon to mix until a dough forms and there are no dry bits left. Knead lightly but do not overwork.
- Divide and Roll:
- Split the dough into two even halves. On a lightly floured surface roll out one half into a rectangle large enough to fit an eleven by seventeen inch greased cookie sheet. Transfer and press it gently into the pan to cover the bottom.
- Mix the Apple Filling:
- In a clean bowl toss the sliced apples with sugar cinnamon salt and flour until evenly coated. Scooping under the apples as you mix helps distribute everything without breaking the fruit.
- Layer Filling and Tapioca:
- Spread the apple filling evenly across the prepared crust. Sprinkle the tapioca granules across the apples to ensure the juices will thicken as the bars bake.
- Top with Second Crust:
- Roll out the second half of dough to the size of your cookie sheet. Carefully lift and lay it over the apples stretching gently to cover the entire surface.
- Egg Wash and Sugar Finish:
- Whip the egg white until frothy then brush it over the top crust to help it brown and shine. Scatter a light layer of white sugar over the egg wash for an irresistible sweet crunch.
- Bake:
- Slide the pan into a three hundred fifty degree oven and bake for thirty five to forty minutes until the crust is golden and the filling is bubbling at the edges. Let cool before slicing into bars.
Every time I layer those apple slices and smell the cinnamon I am taken back to my grandma’s sunny kitchen. I always sneak a few extra apple pieces on top because I love the caramelized edges they create.
Storage Tips
Store apple bars tightly covered at room temperature for up to three days. For longer storage place layers of bars separated by parchment paper in an airtight container and refrigerate for up to a week. You can also freeze individual portions wrapped well and thaw overnight in the refrigerator.
Ingredient Substitutions
If you are short on apples pears make a tasty swap and bring their own floral sweetness. Out of shortening you can use cold unsalted butter just cut it in quickly to keep the crust tender. Whole wheat or pastry flour will add a nutty undertone but keep in mind the texture will be more dense.
Serving Suggestions
Serve these bars warm with a scoop of vanilla ice cream or a dollop of whipped cream for extra flair. They also taste wonderful at room temperature with a dusting of powdered sugar on top or paired with coffee for breakfast or brunch.
A Slice of History
Apple bar recipes like this one hail from classic Midwest church cookbooks and have been a staple at community events for generations. They were designed for practicality using what farmers had on hand and they always brought people together after harvest.

Common Recipe Questions
- → How do I prevent a soggy bottom crust?
Roll the crust evenly and ensure excess juice from the apples is mixed with flour and tapioca, which help thicken as the bars bake.
- → What's the best apple variety to use?
Firm, slightly tart apples like Granny Smith or Honeycrisp work well, holding their shape and balancing sweetness.
- → Can I make these bars ahead of time?
Yes, they store well in an airtight container for up to three days and can be slightly warmed before serving.
- → Do I need to peel the apples?
Peeling apples creates a softer texture, but you can leave the skins on for extra fiber and a rustic feel.
- → What's the purpose of brushing egg white on top?
Egg white helps the crust bake up shiny and golden while helping the sugar stick to the surface beautifully.