
 Save
Save
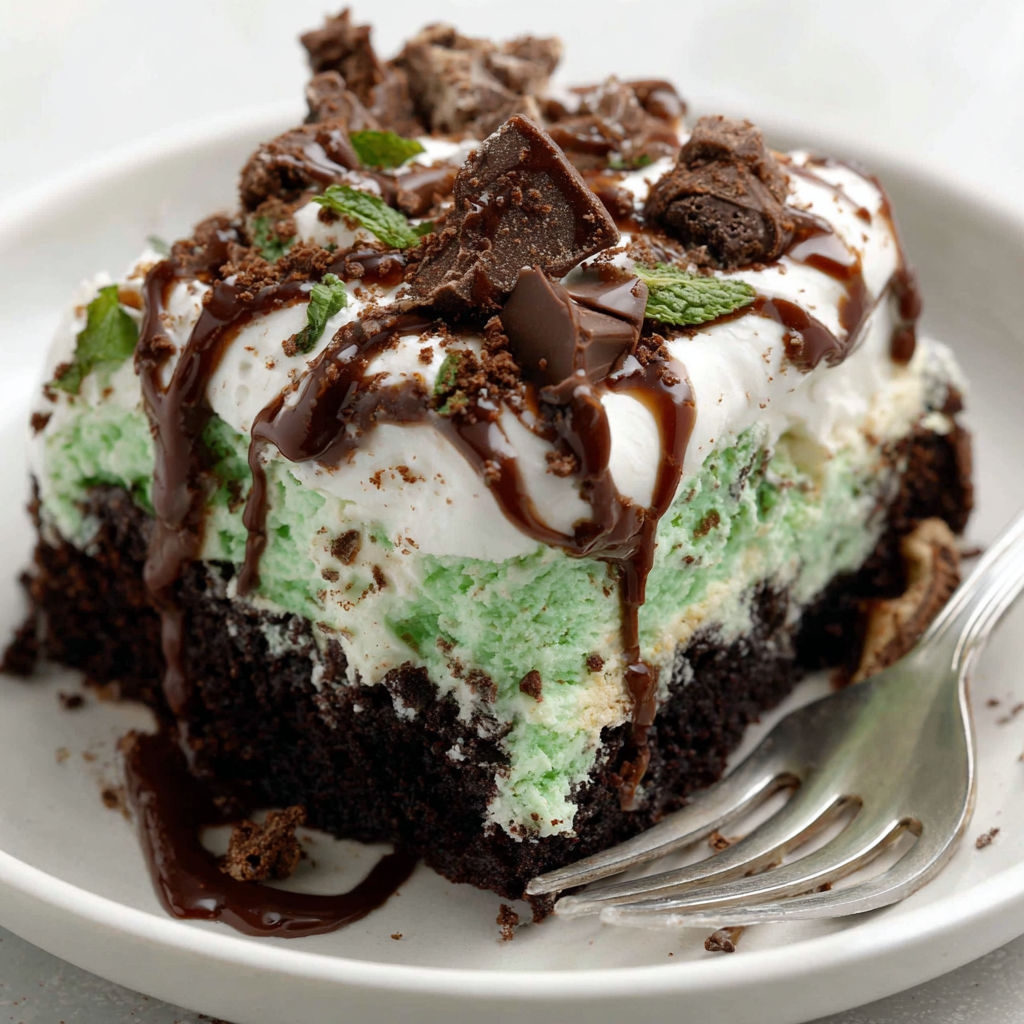
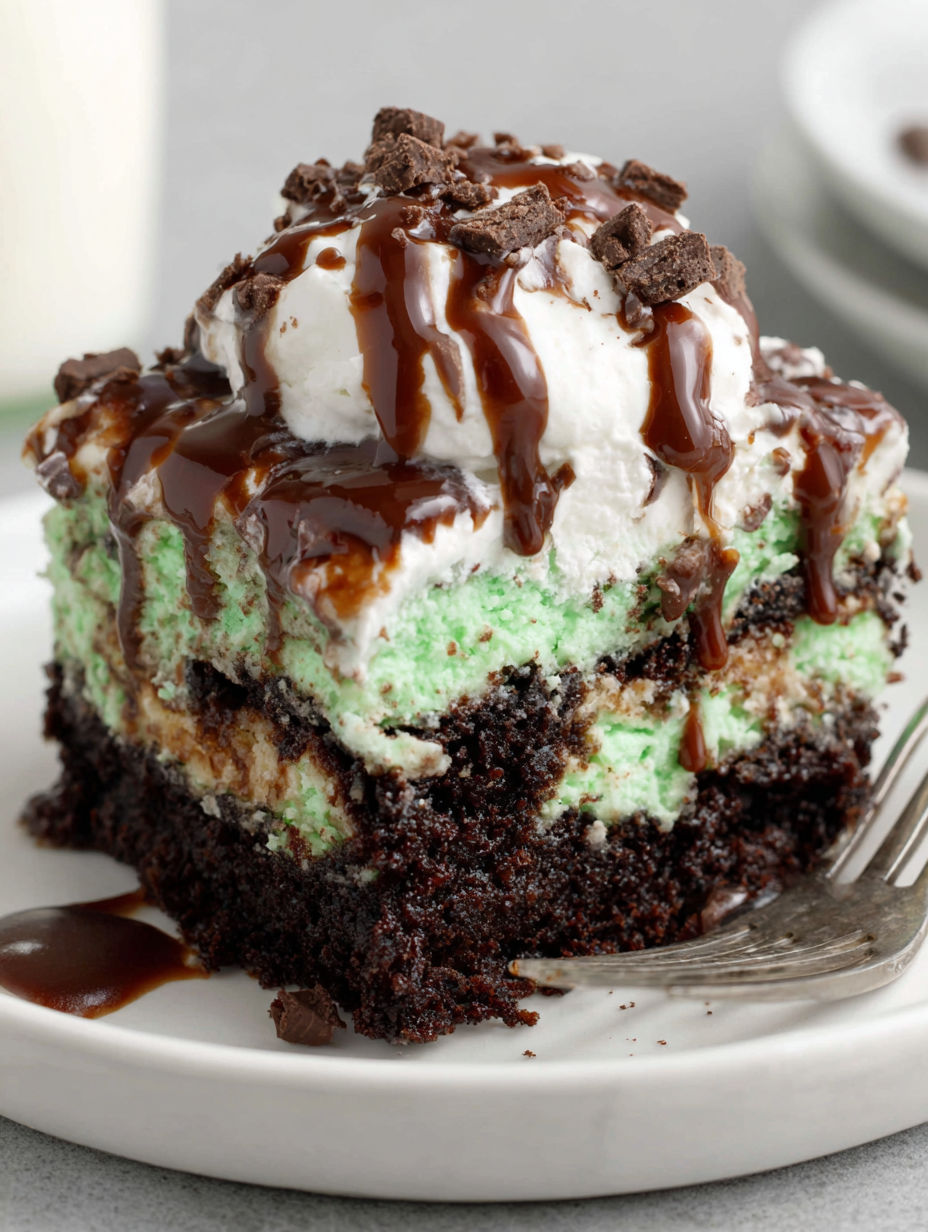
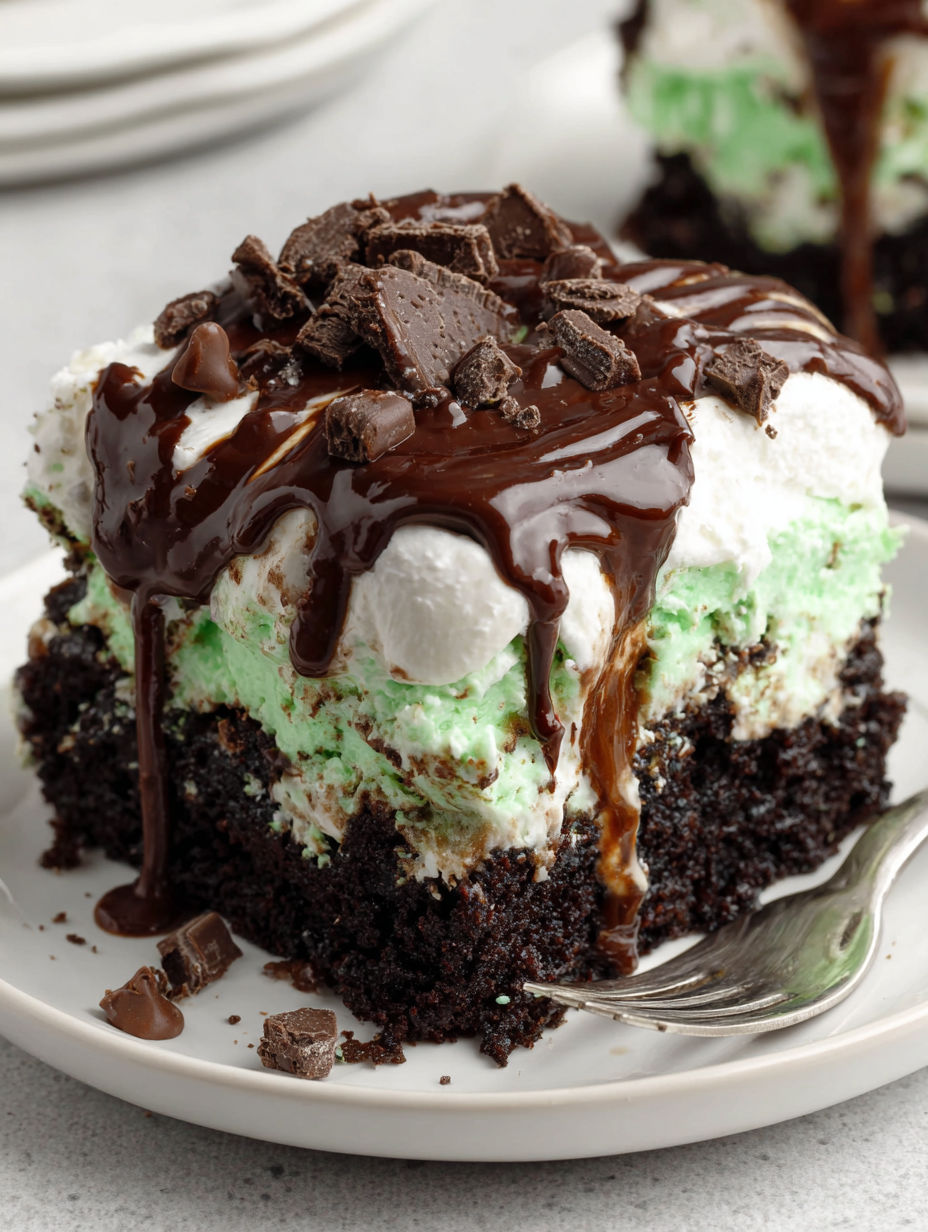
This Mint Chocolate Poke Cake is every bit as decadent and refreshing as it sounds. Perfect for when you want an easy dessert that pairs rich chocolate with cool mint, this recipe is a crowd-pleaser at potlucks and celebrations. The soft layers soak up every flavor, and the bright green mint topping always draws oohs and aahs at my table.
I first served this at a holiday dinner when I was short on time but wanted something show-stopping. Watching everyone go back for a second piece convinced me this would be a go-to dessert for years.
Ingredients
- Devils Food Cake Mix: boxed mix gives you a moist base with deep cocoa flavor look for Duncan Hines or another high-quality brand
- Water: ensures the cake batter blends smoothly filtered water is best
- Large Eggs: add richness and structure try to choose fresh free-range eggs
- Vegetable Oil: provides tenderness to the crumb light-flavored oils work well
- Sweetened Condensed Milk: adds sweetness and helps create a fudgy texture I prefer Eagle Brand for consistency
- Semi Sweet Chocolate: brings extra chocolate flavor look for good-quality chocolate chips or a bar
- Whole Milk: helps make the pudding layer creamy cold from the fridge is ideal
- Instant Chocolate Pudding Mix: thickens fast and adds another chocolate layer check for freshness
- Cool Whip: makes a fluffy mint topping let it thaw completely before mixing
- Green Gel Food Coloring: gives that classic mint color add a tiny amount at a time until you reach the right shade
- Pure Mint Extract: infuses the topping with clean mint notes always opt for pure extract not artificial flavor or peppermint
- Andes Chocolate Mint Candies: sprinkle on creamy minty bits choose original or cookies and cream for variety
- Chocolate Syrup: for a glossy drizzle just before serving choose a high-quality syrup for best appearance and taste
Instructions
- Preheat Oven and Prepare Cake Mix:
- Preheat your oven to the temperature listed on the cake mix box usually 350 degrees F. In a large bowl combine the cake mix water eggs and vegetable oil mix until smooth and no lumps remain.
- Bake the Cake:
- Pour the batter into a greased 9 by 13 inch baking dish. Bake for 25 to 30 minutes or follow your cake mix instructions. Test for doneness with a toothpick inserted in the center it should come out clean. Let the cake cool slightly on a wire rack.
- Poke and Soak the Cake:
- Once the cake is warm but not hot use the end of a wooden spoon to poke holes all over the cake every inch or so. Melt your semi sweet chocolate chips in a microwave safe bowl in short bursts until smooth. Add sweetened condensed milk to the melted chocolate and whisk together until fully incorporated. Slowly pour the chocolate condensed milk mixture over the cake letting it seep into the holes.
- Prepare Chocolate Pudding Layer:
- In a medium bowl use a whisk to combine cold whole milk and instant chocolate pudding mix. Whisk until the pudding is thick and smooth this usually takes about two minutes. Spread the pudding evenly over the surface of the cake covering every poke hole.
- Add Mint Layer:
- In another bowl gently fold together thawed Cool Whip green gel food coloring and pure mint extract. Blend only until uniform in color and taste do not overmix. Smooth this mixture over the pudding layer reaching to the edges.
- Garnish and Chill:
- Roughly chop Andes Mint chocolates. Scatter generously over the cake for bursts of minty crunch. Drizzle chocolate syrup evenly over the surface. Refrigerate for at least one hour to let flavors meld and layers set up.
- Serve:
- Once chilled slice into squares. Use a clean spatula for tidy servings. Serve cold and enjoy the refreshingly rich layers.
When I was learning to bake as a teen I remember picking Andes mints layer by layer from this very cake at my grandma’s table convinced the candy was the best part. Now every time I chop that green and brown candy I am reminded how family recipes bring us together.
Storage Tips
Keep leftovers in an airtight container in the fridge for up to five days. For gatherings use the baking dish’s lid or wrap tightly with foil to keep layers moist. If you want to keep it even longer this cake holds up well in the freezer. Slice and wrap tightly in plastic and foil then label and freeze for up to three months. Thaw in the fridge overnight before serving.
Ingredient Substitutions
Go gluten free by swapping out the boxed cake for a certified gluten free mix and double check your pudding and candies are suitable. For dairy free lovers use a dairy free condensed milk and coconut whipped topping. If you need to skip the food coloring leave it out the cake will still taste great with the mint extract alone.
Serving Suggestions
I love cutting this cake into squares and pressing a fresh mint leaf into the Cool Whip topping for a fancier presentation. Try serving each slice with an extra drizzle of chocolate syrup or a scoop of vanilla ice cream for true dessert lovers. At holiday gatherings I garnish with extra chocolate curls or sprinkles to match the occasion.
Cake Origins
Poke cakes became popular in the seventies as a way to jazz up boxed cake mixes and keep them extra moist. The combination of chocolate and mint is classic in American desserts from ice cream shops to Girl Scout cookies. This version is a fresh update with layers that surprise in every bite.
Seasonal Adaptations
Use pastel sprinkles or colored candies for spring celebrations. Try peppermint extract and red candies for a winter twist. Switch to chocolate shavings or crushed nuts for a more grown up finish.
Success Stories
Many friends have told me this is their kid’s most requested birthday cake. It is also popular as an office treat since you can make it the night before and bring chilled squares to share. Once I even made it for a bake sale cutting into mini squares and they sold out in minutes.
Freezer Meal Conversion
Make the cake and add the poke filling and pudding layers as usual. Chill and cut into portions. Wrap tightly and freeze. When you need dessert for last minute company or a weeknight craving pull out slices to thaw and top with Cool Whip and candies just before serving.
This cake brings festive color and irresistible flavor to any dessert table. Mint and chocolate fans will want to make it again and again.
Common Recipe Questions
- → How should I store leftovers?
Keep slices in an airtight container in the refrigerator for up to 5 days. This keeps the dessert moist and flavorful.
- → Can this dessert be frozen?
Yes, wrap individual slices or the whole cake tightly in plastic wrap and foil. Freeze for up to three months, then thaw in the refrigerator before serving.
- → How do I achieve an even mint flavor?
Add mint extract gradually to the whipped topping, tasting as you go, and use pure mint extract (not peppermint) for authentic flavor.
- → What is the best way to poke the cake?
Use the handle of a wooden spoon to create evenly spaced holes. This allows the chocolate filling to absorb fully for a moist texture.
- → Are there gluten-free or dairy-free options?
Substitute gluten-free cake mix and use dairy-free condensed milk and whipped topping for dietary needs without compromising taste or texture.
- → Can I add other toppings?
Absolutely! Try adding crushed nuts or different varieties of chocolate candies for extra crunch and flavor.