
 Save
Save
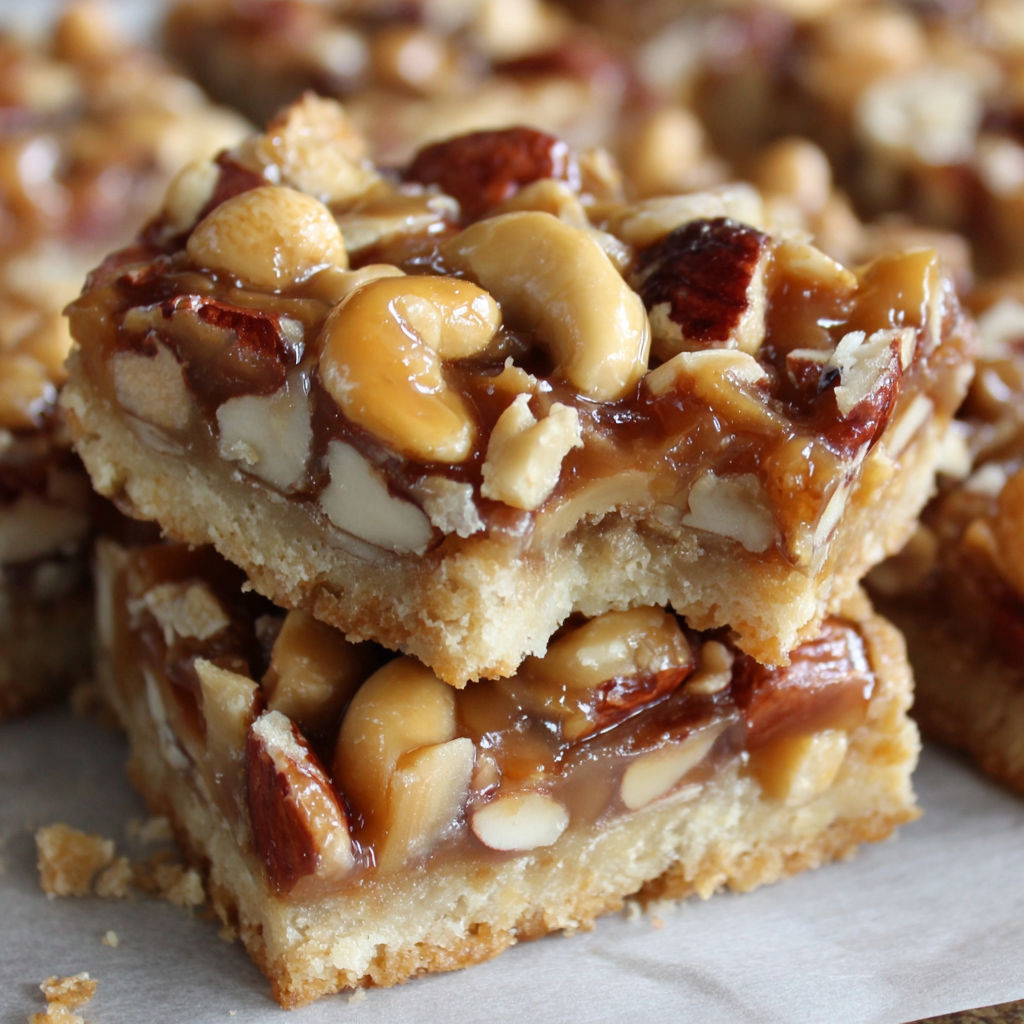
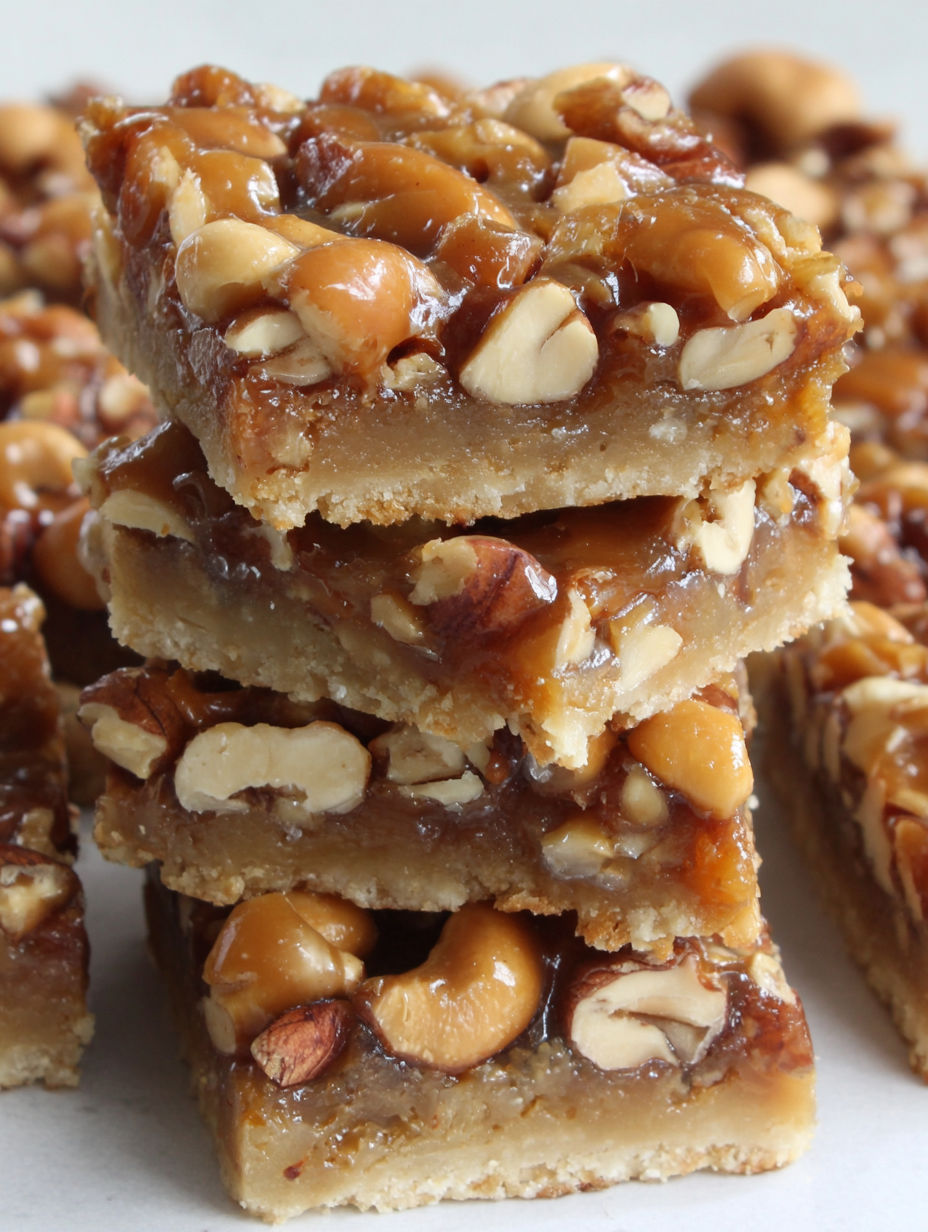
These Butterscotch Nut Bars marry the nostalgia of an old fashioned bake sale with the timeless charm of a layered bar treat. You get a golden shortbread crust, a crown of mixed nuts, and a rich, gooey butterscotch blanket that sets up just right.
When I first baked these for a neighborhood block party, people were lined up with napkins in hand before they’d even cooled. Every time I make these for family gatherings it is a race to see who grabs the corner piece first with its extra crunch and thick butterscotch.
Ingredients
- Flour: Provides structure for the shortbread crust. Look for unbleached all purpose for best results.
- Brown Sugar: Adds depth and caramel notes. Use fresh moist brown sugar for a chewy texture.
- Butter: Creates a tender crumb in the crust and adds creaminess to the butterscotch. Use European style if you want richer flavor.
- Mixed Nuts: Give a pleasing heft and crunch. Choose a mix with plenty of cashews and pecans for contrast.
- Butterscotch Chips: Melt down to a dreamy sweet layer. Make sure your chips are fresh for easy melting.
- Corn Syrup: Helps everything set with a glossy finish. Use light corn syrup for a clean butterscotch color.
Instructions
- Prepare the Pan and Oven:
- Spray your nine by thirteen inch baking pan thoroughly and preheat your oven to three hundred fifty degrees to ensure an even bake and easy bar removal later.
- Make the Shortbread Base:
- Mix the flour, brown sugar, and softened butter together using a fork until you have a crumbly mixture. Press this firmly into the bottom of your prepared pan forming an even flat layer. Use the back of a spoon or the bottom of a measuring cup for a smooth surface. Bake this for ten to twelve minutes until just set and lightly golden.
- Layer the Nuts:
- Once the shortbread is baked, remove from the oven and scatter your mixed nuts evenly across the hot crust. Press them in lightly so they anchor into the base.
- Prepare the Butterscotch Topping:
- In a saucepan over low heat, melt together the butterscotch chips and two and a half tablespoons of butter. Stir continuously and patiently so the mixture stays silky and does not scorch.
- Finish the Butterscotch Layer:
- Remove the pan from heat and stir in the corn syrup, thoroughly blending until smooth and glossy. This will give the topping its signature chew and shine.
- Assemble and Bake Again:
- Pour the butterscotch mixture evenly over the nut layer ensuring every nook is covered. Use a spatula to coax the mixture into the corners. Return the pan to the oven for ten more minutes so the topping bubbles and sets.
- Cool and Cut:
- Once finished, let the bars cool completely in the pan. If you rush to cut them warm, they will crumble. Waiting rewards you with sharp clean slices.
I always look forward to the buttery scent as these cool on my counter. It makes my kitchen smell like a cozy bakery. My favorite ingredient has to be the gooey butterscotch chips which take me straight back to childhood whenever they melt.
Storage Tips
Let the bars cool completely before slicing for clean squares. Keep them in an airtight container at room temperature for up to five days or refrigerate for a firmer bite. If you freeze them, separate layers with wax paper so they never stick together.
Ingredient Substitutions
If you are out of mixed nuts, try just pecans or walnuts. For a fun twist, swap butterscotch chips with chocolate or peanut butter chips and see what combo you love. You can use maple syrup in place of corn syrup for an earthier note.
Serving Suggestions
Cut into small squares for bite size nibbles at a party. Pair with coffee on a breezy afternoon or wrap a piece in parchment for a sweet lunchbox surprise. For special occasions, drizzle with a little melted chocolate or sprinkle flake salt just before serving.
Cultural and Historical Context
Butterscotch bars have roots tracing back over a century as a creative way to use pantry ingredients and stretch butter and sugar for community events. Their popularity soared at church bake sales and potluck suppers where every bar had its own signature twist. Today they still evoke that same homespun spirit.
Seasonal Adaptations
Top with chopped dried cranberries or cherries for a festive holiday feel. Sprinkle with orange zest in winter to brighten the flavor. Use just pecans in the fall for extra warmth.
Helpful Notes
No mixer needed, this recipe comes together with just a sturdy fork. Chop any oversized nuts for even distribution in every bite. Lining your baking pan with parchment makes bar removal even easier.
Success Stories
When I brought these to a family reunion last summer, they vanished from the dessert table twice as fast as anything else. One young cousin even traded his slice of cake for an extra nut bar. They always get rave reviews at bake sales and picnics.
Freezer Meal Conversion
Freeze bars in a single layer then store in a zip top bag for up to two months. Thaw at room temperature and you would never guess they were not freshly baked. This makes it a breeze to pull out homemade treats even on busy days.

Enjoy these bars with friends, or tuck a few away for an afternoon treat with coffee. They are sure to be a new favorite in your bar cookie rotation.
Common Recipe Questions
- → What nuts work best in these bars?
Mixed nuts create a rich flavor variety, though pecans, walnuts, and cashews also pair beautifully with butterscotch.
- → How do I prevent the shortbread base from getting soggy?
Bake the shortbread layer until lightly golden before adding nuts and the butterscotch topping to keep it crisp.
- → Can I substitute butterscotch chips?
If butterscotch chips aren’t available, try using caramel chips for a similar flavor, though it will slightly alter the taste.
- → What’s the best way to cut these bars cleanly?
Allow the bars to cool completely in the pan before slicing with a sharp, lightly greased knife to ensure neat edges.
- → How should I store leftovers?
Keep bars in an airtight container at room temperature for up to four days, or refrigerate for longer freshness.