
 Save
Save
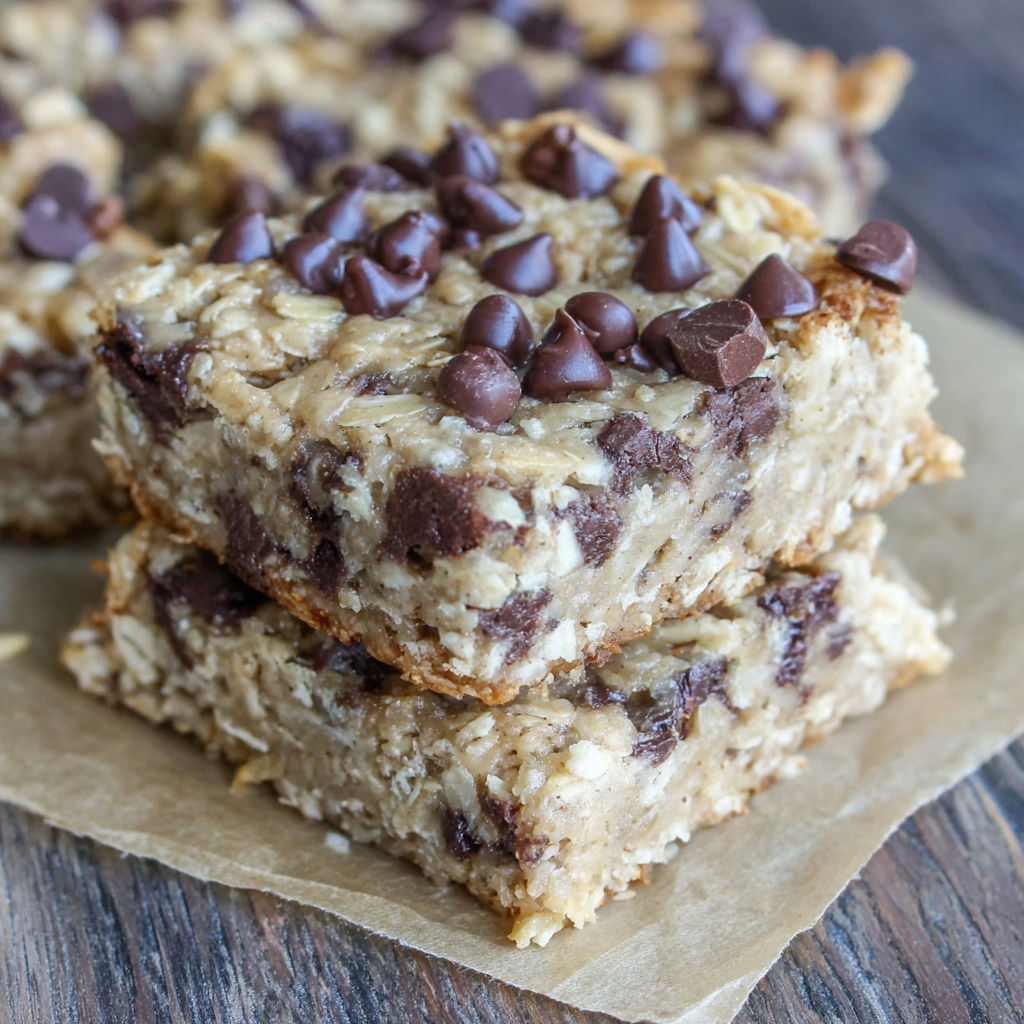
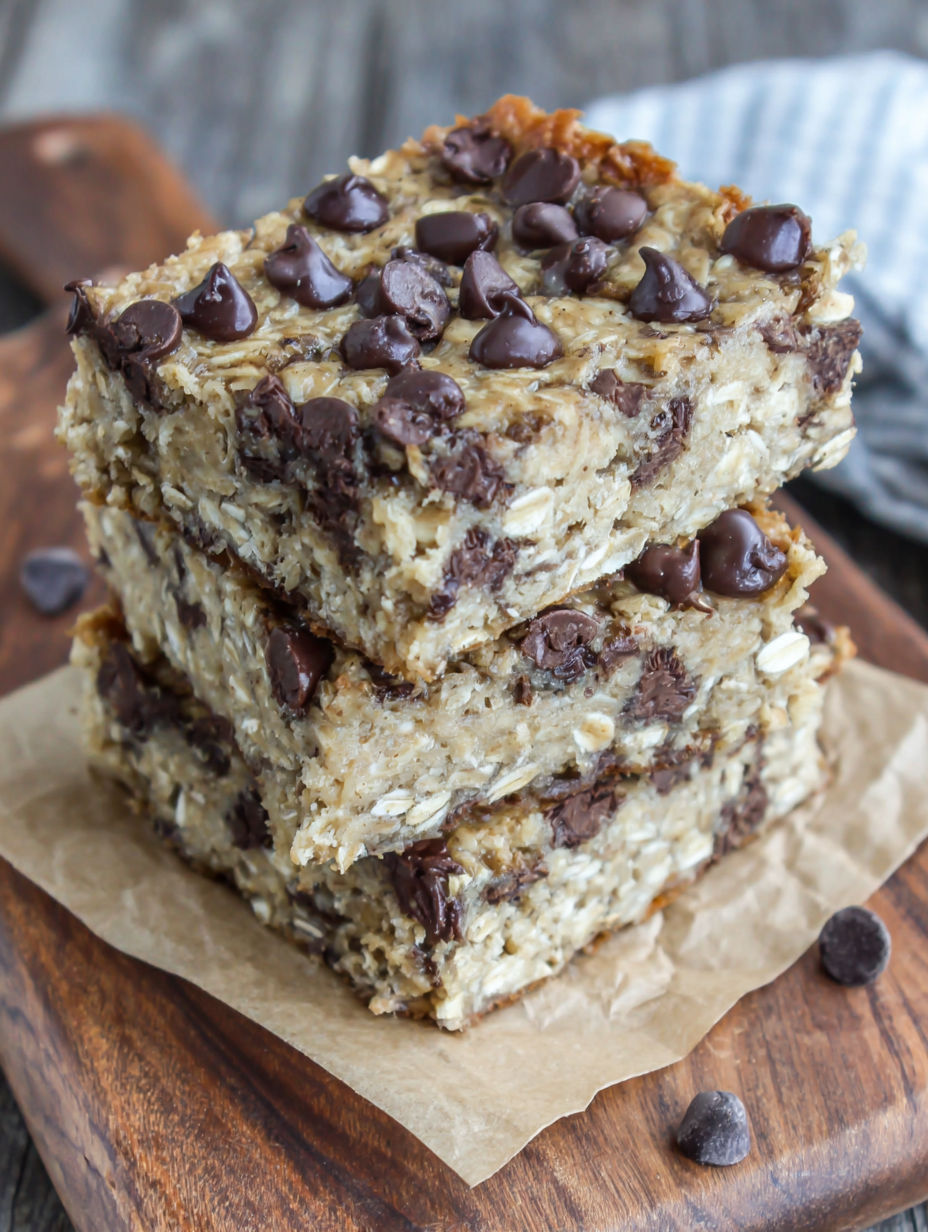
Easy Chocolate Chip Oatmeal Breakfast Squares make early mornings so much easier for my family. These bars are both wholesome and just sweet enough to feel like a treat plus they are portable for busy weekdays. I love how they use kitchen staples and can be prepped ahead for stress—free breakfasts all week.
The first time I made these squares was before a big road trip because I needed something satisfying and easy to pack. Ever since my family has asked for them almost every week and I love knowing they are getting a nourishing start.
Ingredients
- Rolled oats: the heart of the bar bringing great texture and wholesome fiber look for old fashioned oats without additives
- Applesauce: keeps the bars moist without any oil or eggs use unsweetened for the healthiest version
- Water: softens the oats so the bars hold together
- Salt: adds balance to the sweetness and brings out the subtle flavors
- Vegan mini chocolate chips: dreamy pockets of chocolate in every bite choose high quality dark chocolate chips for maximum flavor
- Peanut butter: supplies protein and creamy richness try natural peanut butter without added sugars or oils
- Maple syrup: gently sweetens the bars and adds a hint of depth pure maple syrup gives best results
- Vanilla extract: rounds out the flavors and gives that bakery style aroma reach for real vanilla if you can
Instructions
- Prepare your pan:
- Line a nine by thirteen inch glass pan with parchment paper The parchment makes it easy to lift out the bars after baking and reduces sticking
- Combine the ingredients:
- In a very large mixing bowl add rolled oats applesauce or mashed banana water salt mini chocolate chips peanut butter maple syrup and vanilla extract Stir with a big spoon so everything is evenly incorporated
- Mix thoroughly:
- Stir until every oat is coated and the mixture is uniform This step is important because it prevents dry spots once baked
- Spread in the pan:
- Pour the thick oat mixture into your prepared pan Use the back of a spoon to press it into an even layer making sure to get right into the corners
- Add more chocolate:
- If you want extra chocolate flavor scatter more mini chips across the top and lightly press them in with your palm
- Bake:
- Slide the pan into a preheated three hundred fifty degree oven Bake for twenty eight minutes You will see the edges firm up while the center looks set
- Rest in the oven:
- When time is up do not open the oven door Simply turn off the heat and set a timer for twenty minutes This gentle finish sets the bars perfectly and keeps them moist
- Cool and slice:
- Remove the pan from the oven Let it cool to room temperature on a rack When fully cooled lift out using the parchment and slice into squares with a sharp knife

Peanut butter is my favorite ingredient here I once let my youngest lick the spoon after mixing and her smile was enough proof to keep making these every week Now it is a little tradition while we wait for the bars to cool we enjoy a little peanut butter treat
Storage Tips
Let the bars cool completely before storing to prevent sogginess Store in an airtight container at room temperature for up to three days For longer keeping wrap tightly and freeze for up to two months I like to grab a bar straight from the freezer and pack it it is thawed and ready by snack time
Ingredient Substitutions
If peanut butter is not your favorite try almond or sunflower seed butter for a nut free option Use mashed ripe banana instead of applesauce for extra sweetness and a hint of banana flavor Dried fruit or chopped nuts swap easily for the chocolate if you want a different spin
Serving Suggestions
These bars are wonderful on their own but I sometimes serve them warmed up with a little extra peanut butter or yogurt on the side They pair beautifully with coffee or cold milk For brunches I cut them into triangles and arrange them on a platter with fresh berries
Cultural and Seasonal Context
Oat bar recipes like this are rooted in the idea of wholesome homemade breakfasts Many cultures have a comforting blend of oats and fruit to start the day With applesauce and maple syrup the flavor is especially perfect for fall but you can enjoy these treats any time of year
Seasonal Adaptations
Stir in a pinch of cinnamon in autumn for cozy flavor Swap in dried cranberries or cherries for spring and summer brightness Try pumpkin puree instead of applesauce in late October for a harvest twist
Success Stories
A friend of mine makes these bars during back to school time and says her kids feel like they are getting a cookie in their lunchbox but she feels great about the ingredients These bars have also been a lifesaver for busy mornings at my house when everyone wakes up hungry and we need something quick
Freezer Meal Conversion
To make these perfect for freezer meals I bake and cool completely then freeze individual squares on a tray Once firm I transfer them to a zip top bag They are easy to grab and microwave or let thaw naturally No more morning scramble
Breakfast squares like these mean everyone starts the day happy and satisfied. Spare a few to stash in the freezer and you will always have a treat at the ready for busy mornings.
Common Recipe Questions
- → What can I use instead of applesauce?
Mashed bananas work well as a substitute for applesauce, adding natural sweetness and moisture to the squares.
- → Can I make them gluten-free?
Yes, simply use certified gluten-free rolled oats to ensure the squares are safe for gluten-free diets.
- → Are these bars suitable for kids?
Absolutely! These squares are soft, easy to eat, and packed with wholesome ingredients perfect for children and adults.
- → How should I store breakfast squares?
Store the cooled squares in an airtight container at room temperature for up to three days, or refrigerate for a longer shelf life.
- → Can I adjust the sweetness?
Yes, feel free to add more or less maple syrup depending on your preference for sweetness in your bars.
- → Is it possible to freeze these?
Yes, these squares freeze well. Wrap individually for a handy breakfast or snack option straight from the freezer.